Welcome ROCmommas, ROCpoppas, and Friends!

Have fun with your kids - that's what it's all about. If you're looking for fun places to go in Rochester, NY (ROC), awesome
crafts to make, and yummy treats to bake with your kids - as well as some ideas for Date Nights - then you've come to the
right place. Welcome to ROCmomma. Happy reading, and please share your comments. Thank you!
Showing posts with label crafts for kids. Show all posts

Thursday, June 27, 2013

Backyard Summer Camp: Outer Space Week

If you're home with your kids this summer, you know that a little preparation can go a long way to keep everyone busy and happy. There is nothing I despise more than whining, so until my kids are old enough to "go play" by themselves, I'm sticking with Backyard Summer Camp.

Kids who like aliens, planets, and stars are sure to love these ideas for active/outdoor play, quieter/hands-on play, as well as a couple of destinations to get everyone out of the house while staying here on Earth. Be sure to check out Wacky Sports Week and Under the Sea Week ideas, too!


Outer Space


Active Play

  • ·      Catch a Falling Star (try to get inflated balloons into a laundry basket, using pool noodles)
  • ·      Chalk aliens: lie down on the driveway & trace each other with sidewalk chalk; have kids color in the outlines to turn everyone into aliens
  • ·      Planetary Volleyball (pretend the ball is a planet – let kids pick their favorite) 
  •     In our house, there's bound to be some lightsaber game where we need to defeat the battle droids (imaginary, of course)


·       
Quiet Play
  • ·      Spaceship craft - with alien or without alien (paper bowls, aluminum foil, glue, etc.)
  • ·      Make jet packs (cardboard, ribbon, two empty 2-Liter bottles, silver paint, orange/red felt or foam or streamers, hot glue)
  • ·      Make a solar system mobile (paper, etc.)
  • ·      Moon rocks (rocks, silver paint, black and white tissue paper, glitter glue)
  • ·      Galaxyplay-dough (2 c. flour, 2 c. water, food coloring, 1 Tbsp. oil, 1 Tbsp. cream of tartar, 1 c. salt, glitter, star shapes, faux gems, etc.)
  • ·      Fiery suns (paper, paint, plastic wrap)
  • ·      Handprint alien (paint, paper, google eyes - make a handprint with only three fingers & pointing up; add eyes to top of each fingerprint; draw legs)
  • ·      Balloon rocket (cardboard tube, balloon, card stock, safety scissors, glue, markers/crayons)
  • ·      Footprint rocket (white paint, black paper)
  • ·      StarWars crafts (Yoda & Chewbacca puppets - need to print the templates & directions, plus a trip to the craft store...but will be worth it for any fanboys & fangirls!)
  • ·      Make a LEGO space ship and aliens
  • ·      Read stories about planets, outer space
  • ·      Write a story together about visiting outer space. Let kids illustrate.

·      
Field Trips
  • ·      Visit a planetarium and check out a giant-screen film
  • ·      Go to the library for books about the planets, outer space


Have fun with your own Outer Space Week! As always, thanks for reading.

Wednesday, June 26, 2013

Backyard Summer Camp: Under the Sea Week

If your kids aren't old enough to occupy themselves this summer, these Backyard Summer Camp theme weeks are your solution to battle boredom and ward off whining. Be sure to check out the previous post on Wacky Sports week, too.


Under the Sea

Active Play
  • ·      Sprinklers
  • ·      Water table
  • ·      Fill kiddie pool or large bin with water and sea creature toys
  • ·      Squirt guns

·
Quiet Play
  • ·      Jellyfishhanging craft (paper bowls turned upside down, paint, googly eyes, glue, ribbon for tentacles & to hang it)
  • ·      Make a handprint crab (red paint, paper, glue, sand)
  • ·      Fishsun-catchers (old CDs, paper, string, etc.) 
  •     Float A Fish (Fish bowl craft) 
  •     Whale craft (flower pots or plastic cups, foam sheets, paint, etc.)
  • ·      Make LEGO sea creatures
  • ·      Read stories about sea creatures
  • ·      Write a story together about living under the sea. Let kids illustrate.

·       
Field Trips
  •     Head to the beach to collect seashells
  • ·      Visit the fish at a pet store
  • ·      Go to the library for books about the sea


Have fun with these Under the Sea activities, and be sure to Post a Comment and let us know how you enjoyed this theme week! As always, thanks for reading.


Thursday, February 28, 2013

St. Patrick's Day Crafts for the Wee Ones

Whenever I run out of ideas for my kids, I check the calendar. Holidays provide days of boredom-busting fun. Making decorations takes up a few afternoons. Then a day to decorate. And after the holiday is over, an afternoon of taking down the decorations. That's a minimum of three no-brainer days. Sweet.

Yesterday we decided to make St. Patrick's Day decorations. I quickly consulted Pinterest and found a rainbow, leprechaun, and pot of gold that all seemed fun and easy. While my older son was at school, I set up our dining room with a plastic tablecloth. Then I gathered materials for our projects:

Gold at the End of the Rainbow

  • paper plates, cut in half
  • washable paints
  • paintbrushes
  • wet wipes for messy hands, spills, etc.
  • craft glue
  • cotton balls, 4-6 per rainbow
  • ribbon, cut into varying lengths (around 4-6 inches each), 4 strands per rainbow
  • tape
  • circles cut from a few sheets of yellow construction paper (TIP: If you have a circle punch for scrapbooking or card-making, it will make this part much easier. I used a 1.5" circle punch.)
  • glue stick

1. Paint a rainbow on the paper-plate half.
2. Use glue to secure cotton balls for the clouds; set aside to dry.
3. Use glue stick to sandwich two gold coins together, with the ribbon in between.
4. When the paint is dry, turn the rainbow over and secure the ribbons to the back with tape.

Leprechaun Faces
  • paper plate, 1 per leprechaun
  • orange, green, black, and yellow construction paper
  • google eyes (or black crayon or marker)
  • glue stick


1. For younger children, cut the pieces ahead of time; older children may cut their own. Use the paper plate as a guide for the size of the beard (orange paper) and the hat (green paper).
2. Use the scraps left from the orange paper to cut a mustache.
3. Use the hat as a guide to cut a strip from the black paper.
4. Cut a square from the yellow paper. Fold in half to cut out the inside, leaving a hollow square for the buckle.
5. Use glue stick to adhere all the pieces to the paper plate. If not using google eyes, draw the eyes with marker or crayon.

Pot O'Gold

  • black construction paper
  • circles cut from a few sheets of yellow construction paper (again, a circle punch helps)
  • glue stick
  • St. Patrick's Day stickers (optional)

1. For younger children, cut the pieces ahead of time; older children may cut their own. Cut a pot from the black paper, using the photo as a guide. Folding the paper in half helps to achieve a symmetrical shape.
2. Use glue stick to adhere gold coins to the top.
3. If desired, use St. Patrick's Day-themed stickers to decorate your pot of gold. I thought that would be fun; my kids were not interested.


Put them all together, and you have a cute scene to make any room more festive for March 17th.

I hope you have fun making these St. Patrick's Day crafts with your kids. As always, thanks for reading.

Thursday, February 14, 2013

Get Ready for February Break

ROCmomma will be MIA for February Break, but never fear! Here are over 90 ideas to keep you prepared and sane - and keep the kids busy - over the next week home from school.


Indoor Fun for Kids

48 Simple Ways to Beat Boredom This Winter


Power's Out/ Rainy Day/ Snowy Day Ideas - 19 super-fun, super-easy ideas

Beat the Rainy Day Blahs - 6 more ideas

Time for a Scavenger Hunt - check out the tips for an indoor scavenger hunt


Craft Ideas


Toilet-Paper Tube Snowman Craft

Winter Crafts for Kids

Make a Sun Catcher! 

Stamping with Vegetables


Ongoing Exhibits 


Race: Are We So Different?
Daily through Sunday, April 28 during regular museum hours
Rochester Museum & Science Center, 657 East Avenue, Rochester, NY
Explore the stories of race from biological, cultural, and historical points of view. This new exhibit features hands-on activities, 3-D animation, and more. Included with regular museum admission.

LEGO Travel Adventure
Daily through May 12, 2013
National Museum of Play at The Strong, One Manhattan Square, Rochester, NY
Hands-on LEGO and DUPLO building stations, racing ramps, tons of LEGO displays by LEGO Master Builders, and even a spot to take a photo of your own creation and email it to yourself or friends and family. Included with regular museum admission. Check out the ROCmomma review here.


Everyday is a Holiday

Saturday, February 16 is National Almond Day - make your own Almond Butter and spread it on sandwiches with sliced bananas and strawberries. Yum!

Sunday, February 17 is Random Acts of Kindness Day - get some inspiration here

Monday, February 18 is National Battery Day - send kids on a mission to find five toys that use batteries and bring them into one room; turn everything on and race toys that move on their own.

Tuesday, February 19 is Chocolate Mint Day - get the kids in the kitchen and make some Chocolate Mint Brownies

Wednesday, February 20 is  Love Your Pet Day - what a great reason to visit Lollypop Farm or the Seneca Park Zoo

Thursday, February 21 is National Sticky Bun Day - bake a few batches, box them up, and help the kids deliver them to your neighbors.

Friday, February 22 is International World Thinking Day - this day started within the Girl Scouts, and it is a great excuse to visit the library and find out more about a foreign country. Ask each child to choose one country then find a book at the library. You could even tailor the dinner menu round the country or countries you researched.

Saturday, February 23 is National Banana Bread Day and Play Tennis Day - bake some Banana Bread, then work off the calories with a game of tennis. Can't get outside? Try balloon tennis, using paper plates as racquets.

Sunday, February 24 is National Tortilla Chip Day - Nachos, anyone?


I hope these ideas help during Winter Break. Stay warm, stay sane, and stay smiling. Have a great week, everyone! As always, thanks for reading.


Friday, January 11, 2013

Winter Crafts for Kids

Craft Time! There are still a few inches of slush outside, and I don't feel like taking the boys out to play in muddy snow. So, originally I had set out to make snowflake crafts with my boys today. They went in a different direction, but that's okay.

I covered the table with an old plastic tablecloth, and then set up three stations: Snow Painting, Watercolor Snowflakes, and Popsicle Snowflakes.

SNOW PAINTING
Materials needed:

  • dark construction paper
  • used packing peanuts
  • a small bowl or tub from the recycling bin, cleaned and dried (margarine tubs work well)
  • shaving cream (not gel)
  • white craft glue
  • plastic spoon
  • paint brush or foam brush

Directions:
Be sure your work space is covered.

First have your kids mix shaving cream with glue - about half and half - in the empty tub. Stir with the spoon until it's combined, and then paint away. The paint stays puffy when it's dry!

We added packing peanuts to our Snow Paintings to add more texture and dimension.

WATERCOLOR SNOWFLAKES
Materials needed:

  • heavy-weight paper 
  • watercolor paints
  • paintbrush
  • small cup of water
  • masking tape or painter's tape

Directions:
First, cover your work space. Next adhere masking tape to your paper in any design. I was thinking we would do snowflake designs, but one wanted his name and the other wanted a crayon shape.

Let your kids go crazy covering the whole paper with watercolors.

After the painting is completely dry, help your kids carefully remove the tape. The tape "resists" the paint so any shape created by the tape is now white, contrasting with the colorful background.

POPSICLE SNOWFLAKES
Materials needed:

  • 4 wooden craft sticks (popsicle sticks) per snowflake
  • glue dots
  • assorted glitter paints, regular paints, sequins, etc.
  • ribbon for hanging

Directions:
First, be sure the work space is covered.

Next, use glue dots to adhere popsicle sticks together. First create a "+" shape with two sticks (glue dot in the center, where they cross), then add the other two one at a time to create diagonal lines through the cross. Voila! Snowflake. NOTE: You may have to help young kids with this part, or just complete it for them.

Now for the fun part. Let your kids go crazy with glitter paint pens, regular paint, and anything else you have on hand. Sequins, craft feathers, small pom poms, buttons, and pipe cleaners are all fair game.

Once the snowflakes are dry, secure a ribbon loop to the back using another glue dot. Hang the snowflakes and enjoy your winter wonderland.


I hope you and your kids enjoy making these winter crafts. Post a Comment and share your winter craft ideas, too! As always, thanks for reading.  

Thursday, October 4, 2012

Make Your Own "Scare Case"

Welcome to our Scare Case...our Flight of Scares...our Fright of Stares! Whichever name you prefer, this simple Halloween craft looks spooky and awesome. You can make it with items you already have at home, and a Martha-level of creativity is not required. My five-year-old helped cut out the black circles for the pupils, and both he and my two-year-old glued the eyes together and helped hang them. It's a fun after-school project!


Here's what you'll need:
  • construction paper - 2 sheets of same color, per pair of eyes; plus white and black
  • scissors
  • glue sticks
  • masking tape or painters tape to hang them up
1. First, cut out your eyes. I placed two sheets of the same color together, so it's less cutting, and to get two matching eyes. You can make them fancy, if you'd like.
Or make simple ovals (loosely fold the paper in quarters before cutting).
Or, just about any shaped eyes you can imagine.
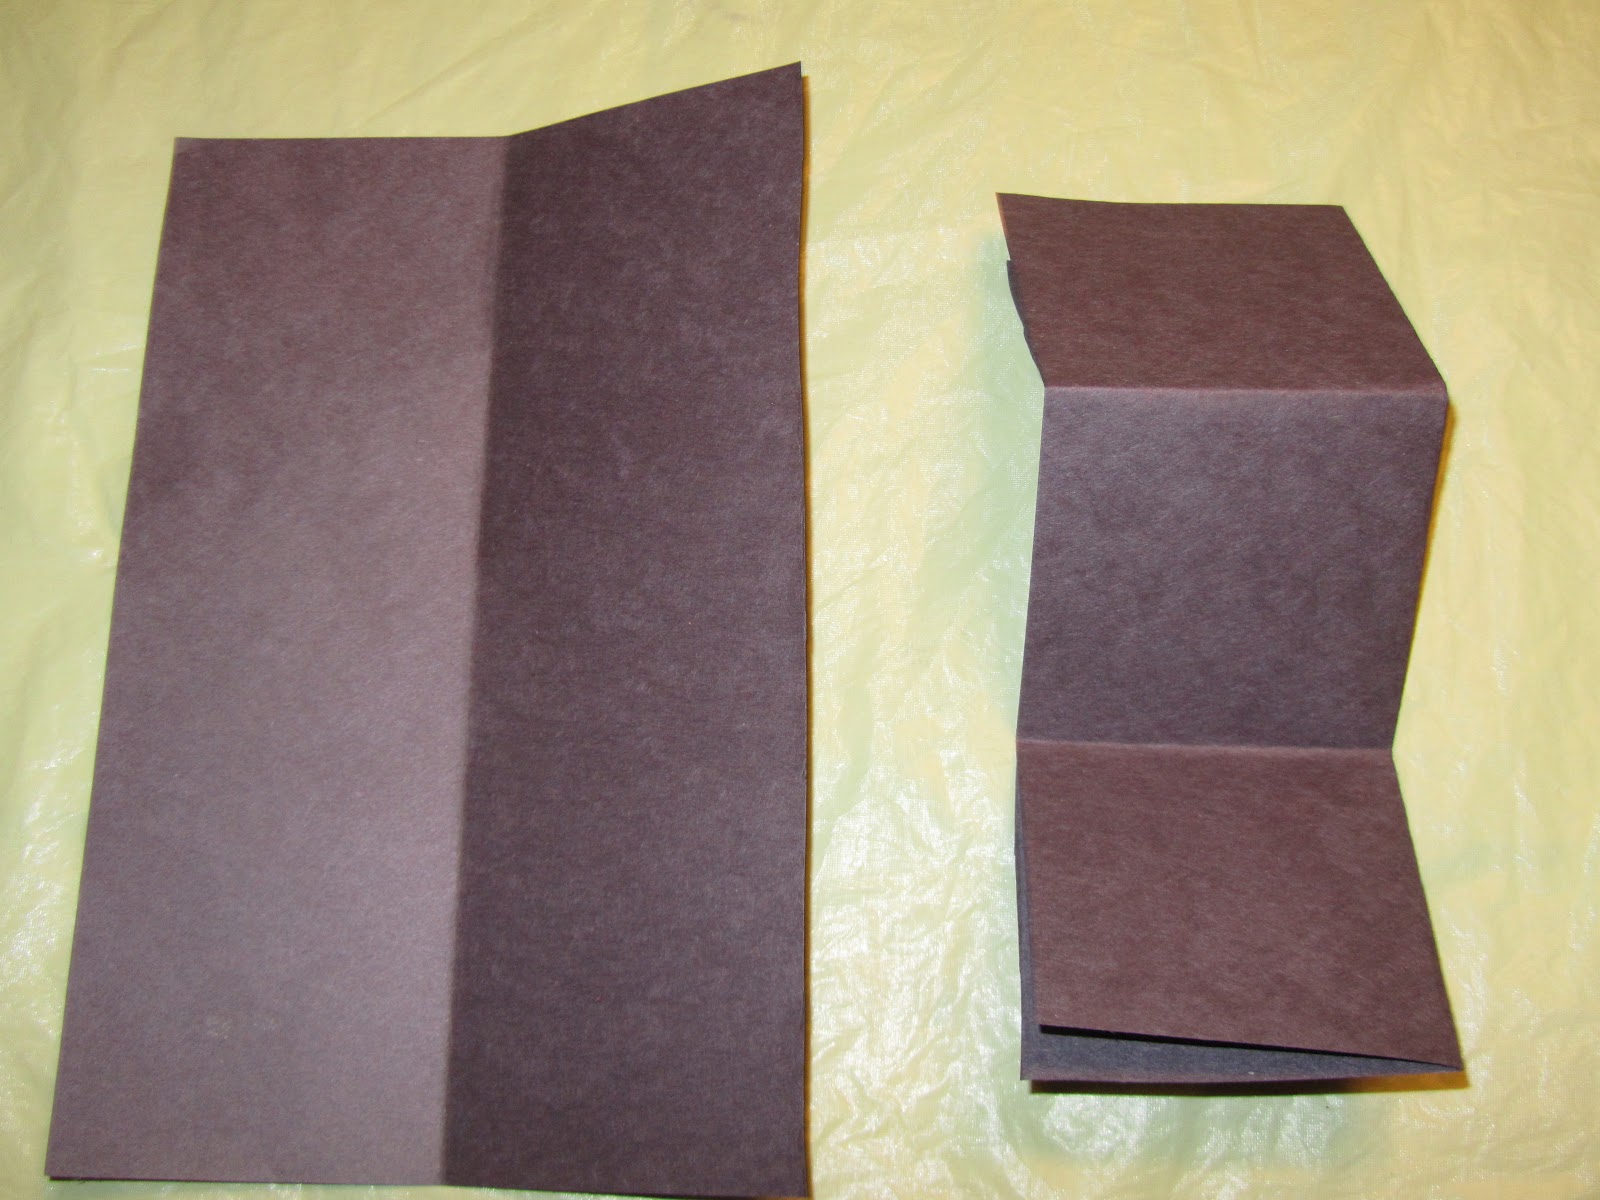
2. Next, fold a sheet of white paper in thirds, widthwise, and then in half, lengthwise, to get six rectangles. I planned on using ovals for two of the sets of eyes, and a unique shape for the third set. So, I cut away two of the rectangles.
Using the section with four, fold them again and cut the ovals. Take the section with two, fold again and cut the unique shapes.
3. Fold a sheet of black paper into quarters, widthwise, and cut along the center fold. Take one half of the black paper, fold along the crease, and then fold into thirds. You should have six squares. Keep the squares folded and cut out circles for the pupils.
4. Match up your pieces: 2 colored eyes, 2 whites, 2 black pupils.
5. Create a work station for each child with their paper pieces and a glue stick.
6. Get gluing!

7. Attach masking tape or painters tape to the back and create your Scare Case! (or Flight of Scares, or Fright of Stares...which name do you like best? Post a Comment and let us know.)
My kids had a blast making these yesterday, and I've already been informed by my five-year-old that we will be making more after school today.

Have fun decorating your home, classroom, or cubicle with these fun, spooky eyes! As always, thanks for reading.

Monday, September 10, 2012

Stamping With Vegetables

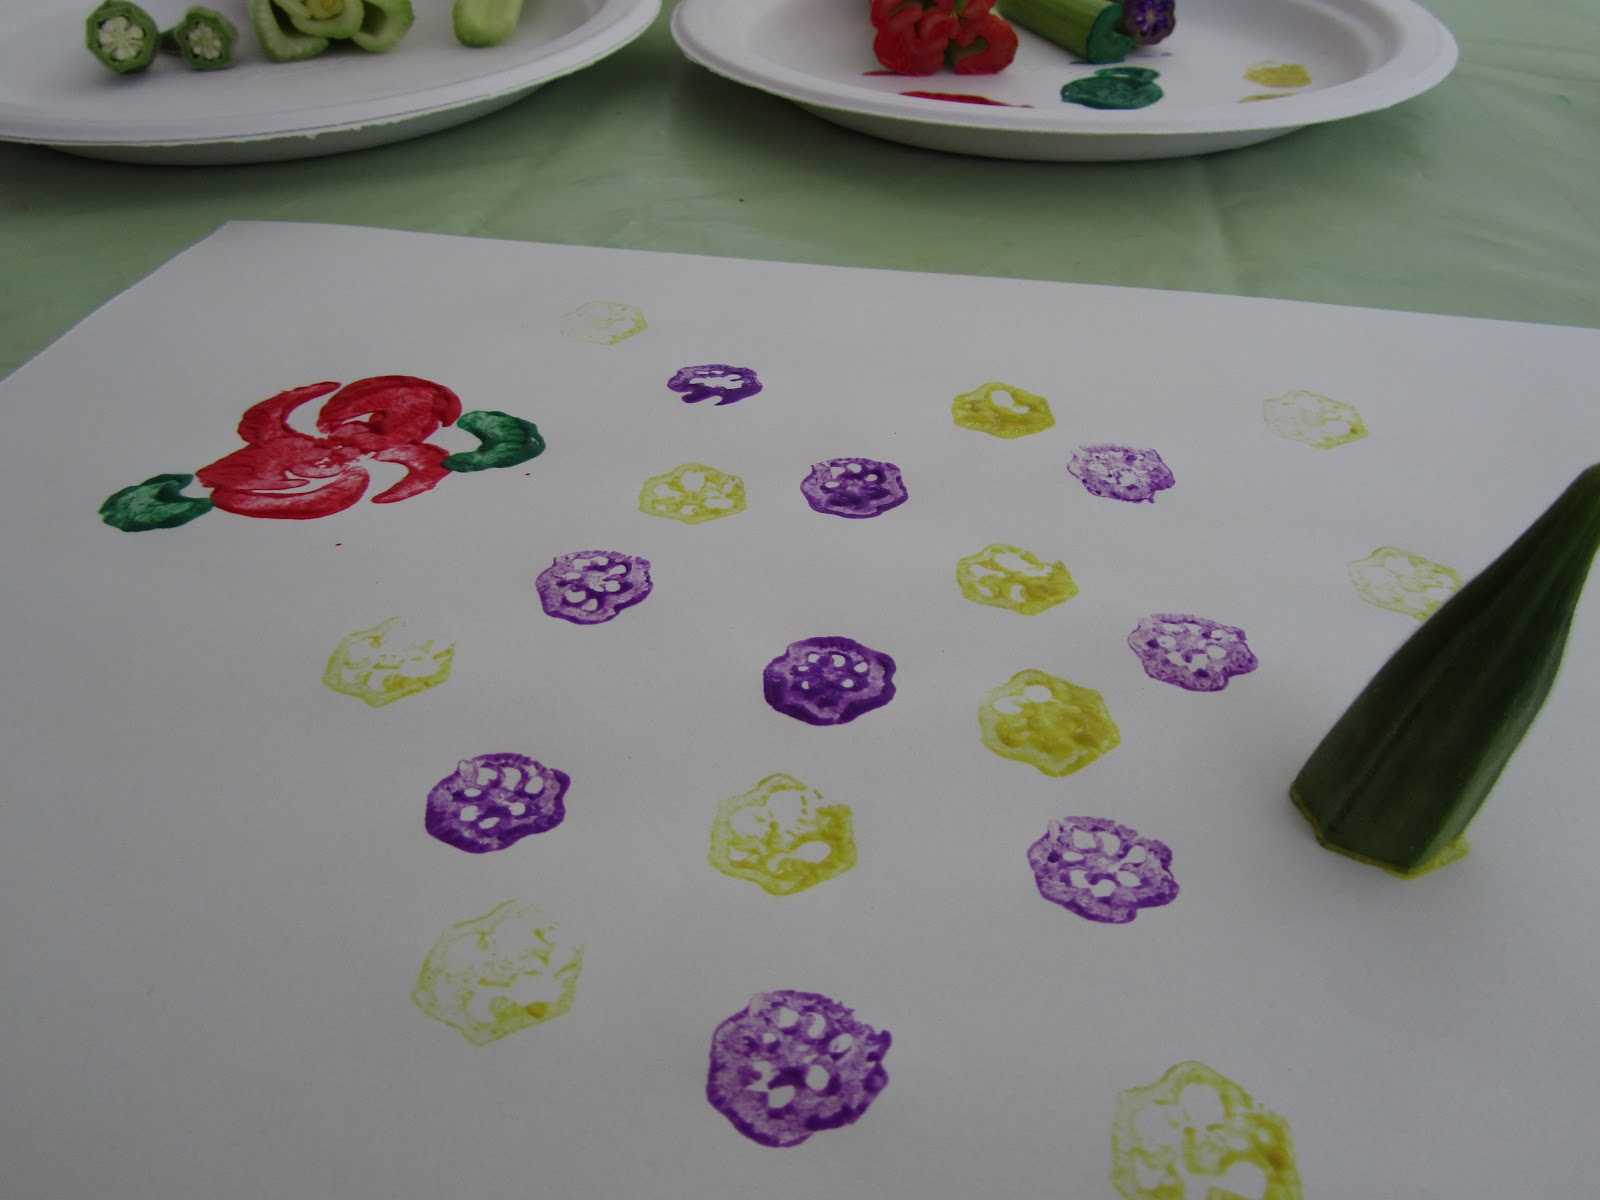
Once you use up all the celery stalks and have just the core left, or when you buy too much okra for your jambalaya, rest assured that your kids can use the remains. As stamps!

We like Crayola Kids' Paint because it washes easily out of clothes if you follow the package instructions and use hot water. You'll also need to cut the okra and the celery core to prepare them for your kids.
Next, make a color palette. Ask your child(ren) to choose colors and pour a little onto a paper plate. Have your child(ren) dip the veggies into the paint, then stamp them onto a piece of paper.
The celery makes roses, and the okra makes cute accent flowers. Use a single celery stalk to make leaves for the flowers.
This could be done on kraft paper rolls for gift wrap, or to decorate plain gift bags or gift boxes. A regular piece of paper with the flower stamps could be framed and given as a gift. So many possibilities!
Full disclosure: my boys did not enjoy this as much as I did. My five-year-old declared the flowers to be "for girls" so he refused to use them. My two-year-old is a "me too" kid, so he did not want to stamp flowers either. He gave it a try, and was quickly done. So perhaps this is a better activity for young girls and less stubborn boys. Oh well; we tried.

I hope you have fun stamping with vegetables! As always, thanks for reading.

Wednesday, September 5, 2012

It Wasn't A Rock...It Was A ROC Monster!

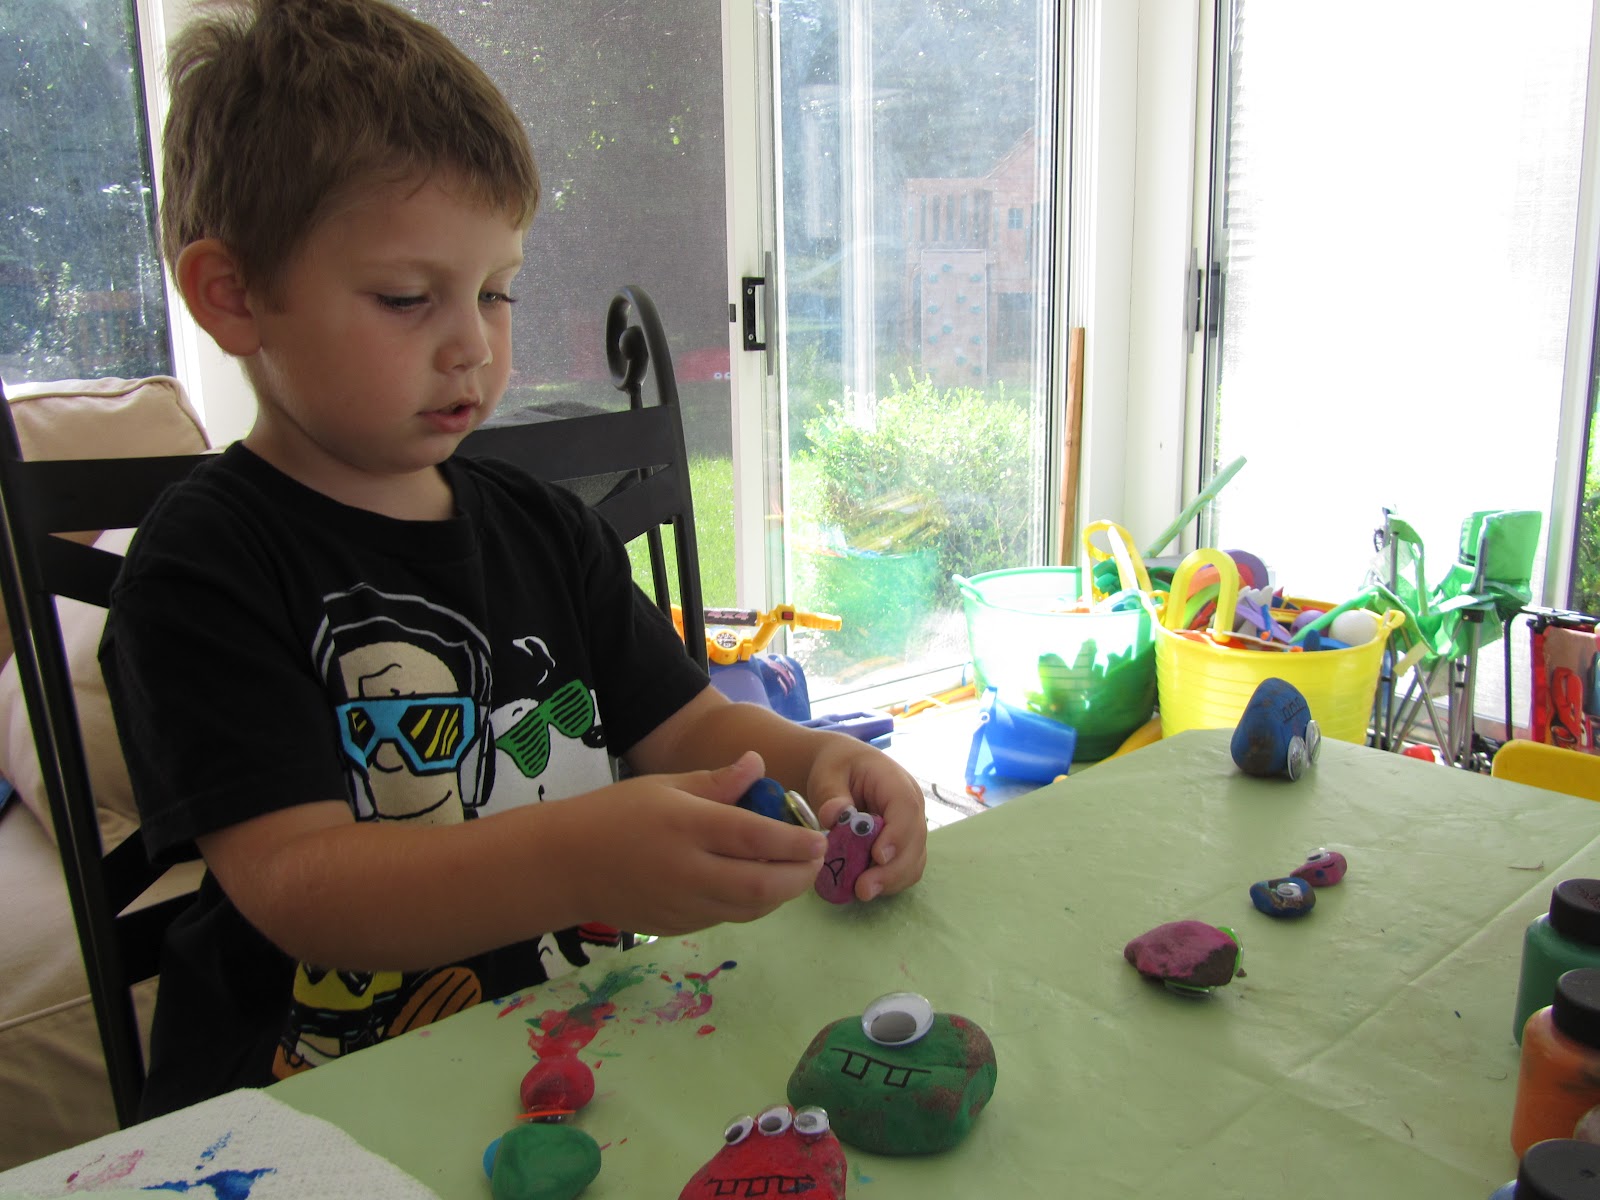
A couple of weeks ago, we went searching for rocks at Mendon Ponds Park. I had seen a really fun idea for Rock Monsters on Pinterest, and thought it would be a fun project for the boys. We collected rocks of different shapes and sizes until we each filled a big cup.
When we got home, I gave the boys a plastic bin filled with water and they washed the dirt off of their rocks, then laid them out to dry. Once they were dry, we painted them. I like to use Crayola Kids Paint because it washes out of clothing if you follow the instructions on the box and use hot water. Obviously, a plastic tablecloth is a good idea for protecting your table.
Once the paint was dry on the rocks, I gave the boys a container of google eyes in different shapes and colors. They selected the eyes and where they should go, while I used the glue gun to adhere them. I set up the glue gun at a separate table for safety purposes.
Then I used a Sharpie marker to add mouths and in some cases teeth and eyebrows, too.

Of course there needed to be a great Rock Monster Battle. One of the rocks is the Bad Guy, and he's trying to capture the two little Rock Monsters. So all of the Good Guys are trying to fight the Bad Guy and protect the little ones. Awww.
"Me Too" formed his own Rock Monster battle. Basically he just kept lining them up, making incredible sound effects, and turning them over one by one. Awesome.
We keep our ROC Monsters in a basket in the sunroom so the boys can play with them in there, or bring them outside to play. This simple activity took up a whole day, plus it has given them something to play with on a regular basis...a very successful boredom-buster, indeed.

I hope this inspires you to make some ROC Monsters of your own! As always, thanks for reading.

Wednesday, August 15, 2012

Messy Backyard Fun Day: Goop and Volcanoes

As summer pushes on, I continue to struggle with getting the kids outside to play since they would rather be inside building with Legos. My solution? Messy Backyard Fun Day (Or two. Or three.) If you read yesterday's post, you know that we had fun using shaving cream with cars and made a Toy Car Wash and then some Marbled Paper.

We also had fun making Goop and making Volcanoes...

To make Goop, you'll need:

  • cornstarch
  • water
  • food coloring
  • mixing bowl
  • plastic spoon
  • tablecloth for your work area

We poured half the box of cornstarch into the bowl, and added a little water at a time. The ratio is about two parts cornstarch to one part water. We also added a few drops of green food coloring (both of my boys' favorite color) and started stirring.
At first I thought we added too much water since it still looked very liquid. But then I scooped some up with a spoon and found that it would break into chunks with solid edges. And then ooze right back down into itself, just like a liquid.
See? Right back into a liquid.
Goop is definitely a bizarre substance. You can push your finger into it and it feels solid, until your finger starts sinking into it. It drips like a liquid, but pools into a solid. It's crazy stuff!!! The kids had fun testing which objects would sink into it. You can try a coin, flower, crayon, leaf, and anything else you can find that's age appropriate. Please just be sure that your kids don't eat the Goop; this is NOT a food recipe.

Once the novelty of the Goop wore off, we moved on to Volcanoes. You'll need:
  • vinegar (we used almost a whole gallon)
  • baking soda (we used 1 1/2 pounds)
  • food coloring
  • tall clear containers, such as the ones used for deli-counter salads
  • small cups (we had some styrofoam cups leftover from a party)

First we sprinkled some baking soda in each tall container. We poured vinegar and a few drops of food coloring into the cups.
Then the fun begins. Let your little mad scientist pour the colored vinegar into the tall container and watch it erupt!
After one round on the table, we quickly moved this activity to the grass because this one is MESSY! Once the reaction stops, you can pour out the liquid; some baking soda will remain at the bottom and can be used again. Simply pour more vinegar and food coloring into the smaller cup, and pour it into the tall container again.
When the baking soda is gone, just add more to the tall container, and keep going with the colored vinegar. The kids had so much fun mixing different colors to see what they would get (yes, you can teach art and science at the same time!), that we ended up erupting volcanoes until we had used up the entire gallon of vinegar!

Even though this was Messy Backyard Fun Day, the mess really wasn't bad at all. Some paper towels and baby wipes helped with the first round of volcanoes, but the rest of the mess stayed in the grass. We ended up keeping the Goop in an airtight container and the bowl washed clean very easily. A quick wipe of the tablecloth, and we were good to go. Clean up really was a snap.

I hope you and your kids have some messy fun this week! Stay tuned for one final Messy Backyard Fun Day adventure with homemade Slime and Fluffy Dough. As always, thanks for reading.
Blogging tips