Welcome ROCmommas, ROCpoppas, and Friends!

Have fun with your kids - that's what it's all about. If you're looking for fun places to go in Rochester, NY (ROC), awesome
crafts to make, and yummy treats to bake with your kids - as well as some ideas for Date Nights - then you've come to the
right place. Welcome to ROCmomma. Happy reading, and please share your comments. Thank you!

Tuesday, February 5, 2013

Toilet-Paper Tube Snowman Craft

Yes, it's almost Valentine's Day. Chances are, if you are making crafts with your kids you are probably making hearts and cupids. But not our family. No. My boys wanted to make snowmen.

Since there is merely a sprinkling of snow left on the ground (no complaints), we made crafty snowpeople indoors. I found this idea through Pinterest on the JT Photography site.
Here is a look at the materials you will need.
MATERIALS FOR EACH SNOWPERSON:
  • Toilet paper tube 
  • White paper, cut to 4 1/2" x 6"
  • Pipe cleaner, cut to 4"
  • 2 pom poms
  • 2 google eyes
  • Orange foam sheet or construction paper to cut nose (approximately 1" long and about 1/2" wide at the base)
  • Ribbon, cut to 12"
  • 3 small buttons (or sequins)
  • Cotton balls
  • Paper plate or other base (other ideas: repurpose a shoe box, shirt box, or even a cereal box)
  • Glue stick, white craft glue, and large glue dots
  • Scissors
INSTRUCTIONS:
Apply glue stick to the edges of the paper, line up the toilet paper tube with one short edge, then roll to cover the tube with paper. You may need to add more glue stick to seal the edge. Use scissors to trim the top or bottom, if necessary.
Apply two glue dots to the top of your toilet paper tube - on opposite sides - and secure the pipe cleaner for the ear muffs.
Adhere a pom pom on each side to cover the ends of the pipe cleaner. Some of each glue dot should still be exposed around the pipe cleaner, and the pom poms will stick to that.
Use glue dots to adhere two google eyes. Then use glue stick to adhere a nose. Next, lay the ribbon on your crafting space and place the tube in the center. Swipe some glue stick across the center of the tube and tie a double-knot with the ribbon, using the glue to secure it in place. Trim the ends of the ribbon with scissors, if necessary.
Secure three buttons onto your snowperson with glue stick.
Next cover a paper plate with craft glue
Place the snowperson in the center, and add cotton balls around it to cover the plate.
We had so much fun making these yesterday, the boys are already asking to make them again today. I guess since it will be an early Spring, we should get all of the winter crafts in now.
I hope you have fun making some snow people. As always, thanks for reading.

Friday, February 1, 2013

Family Fun This Weekend

What's going on in Rochester, NY this weekend? Before we get to that, today is National Freedom Day to commemorate when Abraham Lincoln signed the resolution that became the 13th Amendment, outlawing slavery. In unrelated news, it is also National Serpent Day, making it a good day to visit the python, rattlesnake, or one of the boas at the Seneca Park Zoo.

Saturday is Groundhog Day, of course! Make a fun groundhog craft with the kids, or whip up a groundhog-inspired treat.

Sunday is the Super Bowl, and it is also National Cordova Ice Worm Day! On Ice Worm Day, the people of Cordova, Alaska celebrate the glacier-dwelling worm. Perhaps an ice-cream-spin on Worms in Dirt would be appropriate?

ONGOING
  
Race: Are We So Different?
Friday, February 1 - Sunday, April 28 during regular museum hours
Rochester Museum & Science Center, 657 East Avenue, Rochester, NY
Explore the stories of race from biological, cultural, and historical points of view. This new exhibit features hands-on activities, 3-D animation, and more. Included with regular museum admission.

LEGO Travel Adventure
Daily through May 12, 2013
National Museum of Play at The Strong, One Manhattan Square, Rochester, NY
Hands-on LEGO and DUPLO building stations, racing ramps, tons of LEGO displays by LEGO Master Builders, and even a spot to take a photo of your own creation and email it to yourself or friends and family. Included with regular museum admission. Check out the ROCmomma review here.
FRIDAY

Game Night
Friday, February 1 from 5:30 - 8:30 p.m. (repeats on Fridays through June 14, 2013)
ArtsROC, 3462 Monroe Avenue, Pittsford, NY
Kids ages 5-12 can enjoy movies, Wii, Xbox, Minecraft, tons of LEGOs, and a pizza party for $25 at ArtsROC. Call (585) 218-9125 or email info@artsroc.net for more information. Or click here to register.

Free Family Night
Friday, February 1 from 4:30 - 10:00 p.m.
YMCA- Southeast, 111 East Jefferson Road, Pittsford, NY
The Adventure Center is open from 4:30-9 p.m. (remember your socks!), enjoy pizza in the Lobby at 5:45 p.m until it runs out ($1/slice), play in the Gym from 6-8 p.m., and swim in the pool from 7-10 p.m. Free and open to the community.

Fun Fridays
Friday, February 1 from 6 - 8 p.m.
YMCA-Westside, 920 Elmgrove Road, Rochester, NY
Family gym games, inflatables, obstacle course, crafts, and family swimming. There is no fee for members; $10 per family for the community.

SATURDAY


Ice Cream for Breakfast Day
Sunday, February 3 from 8:30 a.m. - 1 p.m.
Moonlight Creamery, 36 West Avenue (on the canal), Fairport, NY
Top a sundae with your favorite breakfast cereal, order Belgian waffles a la mode, or try an ice cream-filled donut sandwich. Breakfast-themed ice cream flavors include Sow My Wild Oats, Sticky Bunz, and Maple Bacon. Door prizes will be awarded. Proceeds benefit the Make A Wish Foundation.


Bookfair, Concert, and Children's Activities
Saturday, February 2 from 10 a.m. - 4 p.m.
Barnes & Noble, 3349 Monroe Avenue, Rochester, NY
Enjoy performances from the students of Hochstein School of Music & Dance. Visit the children's area at 11 a.m. for Story Hour with Clifford the Big Red Dog; at 12 p.m. make a shaker at the Hochstein craft table; at 1:30 p.m. enjoy Story Hour with Peter & the Wolf. Purchases made in store or online can help support Hochstein.


Family Rhythm/Drumming Event
Saturday, February 2 from 10:30 - 11:30 a.m.
Rhythm Connect, 84 High Street, Fairport, NY
Each participant will choose from various drum and percussion instruments from around the world, as well as explore the "Percussion Paradise" room. Cost is $5 per family and includes one free shaker per family. Get a second free shaker per family when you bring canned goods for Perinton Food Shelf (items needed: canned chili, fruit cocktail, vegetables). Space is limited; register and make payment online (note: scroll to the bottom of the page to find this event and click on the green "Book" button).


Science Saturdays
Saturday, February 2, various demonstration times from 11 a.m. - 3 p.m.
Rochester Museum & Science Center, 657 East Avenue, Rochester, NY
At 11 a.m. and 12:30 p.m. visit the Wildlife Defenders for an up-close look at live native and exotic species. At 11 a.m. and 1 p.m. join Professor Len Ortenzi for "The Science of Sound" (cool demonstrations of sound waves). From 11 a.m. and 3 p.m. enjoy "Medicines & Achoo! I Mean You" to learn about our immune system and how doctors and scientists make this important part of our body work for us. Free with regular museum admission.


Crafty Kids Valentines
Saturday, February 2 from 11 a.m. - 1:30 p.m.
Walworth-Seely Public Library, 3600 Lorraine Drive, Walworth, NY
Stop in any time between 11 a.m. and 1:30 p.m. They supply the materials, you bring the creativity. Ages 4 and up; no registration required.


Open Gym & Extreme Sports Practice Night
Saturday, February 2 at 6:30 p.m. (repeats Saturdays through May 25)
Sports Academy of Victor, 6385 Route 96, Victor, NY
Have fun with mats, sports equipment, tumble track, foam pit, turf field, batting cages, spring floor, and inflatables. Instructors are available to help. For ages 6 and up; cost is $10.

SATURDAY-SUNDAY 

Ski, Snowshoe, or Walk the Village & Nature Center
Saturday, February 2 - Sunday, February 3 from 10 a.m. - 5 p.m. (Saturdays & Sundays through Februrary 24, 2013)
Genesee Country Village & Museum, 1410 Flint Hill Road, Mumford, NY
Ski, snowshoe, or hike through the snow-covered village and nature center trails. The Nature Center trails are open 10 a.m. - 5 p.m., while the Historic Village trails are open noon - 4 p.m. only. Call (585) 294-8262 to check trail conditions. Free for members, $5.50 for non-members. Ski rental is $10, snowshoe rental is $5; equipment available on first come, first served basis. Equipment rental is available at the Nature Center.

Saturday, February 2 from 11 a.m. - 5 p.m. and Sunday, February 3 from 1 - 5 p.m.
National Museum of Play at The Strong, One Manhattan Square, Rochester, NY
Meet Clifford the Big Red Dog and enjoy special readings in honor of his 50th birthday. Don't forget your camera! Included with regular museum admission.

SUNDAY

Family Fun Game Day
Sunday, February 3 from 1:30 - 4:30 p.m.
Rochester Public Library (Central Library), 115 South Avenue, Rochester, NY
Families are invited to come to the Children's Center of the Central Library to enjoy a variety of games for ages 3-11. This program is free, so bring the whole family.

Have a great weekend, I hope your Super Bowl team wins, and as always, thanks for reading.

Thursday, January 31, 2013

Team Umizoomi Birthday Party

Of course my kids always pick birthday party themes that do not have pre-packaged supplies readily available at retail stores. My son's third birthday was no exception. He loves Geo and wanted a Team Umizoomi party...so we made it happen. Sans Party City. Sans Target. Thankfully, the good people at Nick Jr. have provided tons of printables on their web site to help us out.

By the way, if you're reading this and thinking, "Team Umi-wha???," then you most likely do not have preschool-age children, and/or do not watch cable television.

Team Umizoomi is an animated series on Nick Jr. about siblings Geo and Milli and their robot friend Bot who solve problems in UmiCity using their mighty math powers. Yes, it's math and yes, kids love it.

My son's Team Umizoomi party was a family party consisting of four kids and about 15 adults. Even though there weren't many kids at the party, I still wanted to plan some fun activities for them. Here's a glimpse of what we did...

INVITATIONS

Umi Friends, do you feel a celebration coming on?! For your own Team Umizoomi party, you'll want to start by sending invitations. We printed the Team Umizoomi Party Invites from the Nick Jr. web site onto regular paper, trimmed the edges, and folded along the dotted lines. We used foam number-stickers to add a "3" to the front of each invitation.

UMI GEAR

Team Umizoomi, ready for action! Set the tone for your party with your very own Team Umizoomi shirts. Check out the free printables on Nick Jr. (listed below). Just print them onto iron-on transfer paper. Be sure to check the package instructions to see if you need a reversed image or not for your iron-on transfer paper. Both reversed and regular images are available on the web site. We recommend printing the images on white shirts (the ones below were purchased at Target); the image just didn't look right on the gray shirt.
UmiCar Iron-On
UmiCar Iron-On Reversed
Team Umizoomi Iron-On (includes regular and reversed)
Milli Iron-On
Milli Iron-On Reversed
Geo Iron-On
Geo Iron-On Reversed
Bot Iron-On
Bot Iron-On Reversed

DECORATIONS

We printed two sets of the Team Umizoomi Tabletop Decoration onto white card stock. After cutting them out, we used double-sided tape to adhere each pair back to back. Then follow the dotted lines to make the slits, and fit the two sets together.

We made a few garlands using ribbon and some of the printables from the web site:


1. For each printable used, print two copies onto white card stock.
2. Cut out all of the decorations.
3. Measure the doorways and other areas where you will hang the garlands and cut your ribbon accordingly. I left a few extra inches on each end for curling; just mark your "start" and "end" points on the ribbon with masking tape.
4. Use double-sided adhesive to secure each pair of decorations together, with the ribbon in between them. Leave a couple of inches and add another pair to the ribbon. Continue until you have filled the space needed, according to your measurements.
5. Curl the extra ribbon left on the ends, and hang up your festive masterpiece.

The Team Umizoomi Posters are fun and festive. Each one requires four sheets of paper (we used white card stock), plus a couple of minutes to trim along the dotted lines, and secure the pieces together.


Looking for more decorations? I printed the iron-on designs (see links above) onto white card stock, trimmed them, and hung them around the party area. Just be sure you do not use the reverse images.

If you have an insane amount of time before the party, you could make some Platonic solids (three-dimensional shapes) to decorate your party area. This sounded like a fantastic idea to me; I cut and made about three dozen of these shapes. It took forever. Yes, they looked kind of cool. I got to post on Facebook that I was making dodecahedrons (12-sided shape). But really, they did not make or break the party. If you are so inclined, here are the templates to make cubes icosahedrons, tetrahedrons, octahedrons, and dodecahedrons. Be sure to leave yourself plenty of time. And lots of wine couldn't hurt, either.


THE ACTIVITIES

1. Umiriffic Scavenger Hunt - Print the scavenger hunt card and pictures onto white card stock; cut out the pictures; and hang them around the party area (up high, down low...) before the party.

Each child gets a scavenger hunt card and a crayon. They can work together or individually to find all of the pictures on their card.

2. Pattern Power! We made beaded bracelets using pipe cleaners and pony beads. Both are available at craft stores. The kids can string the beads onto their pipe cleaner, then twist the ends together to secure around their wrist.

3. Pin the Shape Belt on Geo. This is a great use for any of the character posters; we used the Geo Poster. Before the party, I used a piece of paper to draft a rectangle that would fit on Geo's shape belt. I used the draft as a template to cut enough belts from yellow construction paper; one per child. If you have an extra minute, draw the circle, square, and triangle on each belt - just like Geo's.

At the party, you'll need masking tape and a bandana or other blindfold (optional - younger kids often don't want to be blindfolded).

4. Super Shapes! Kids can make their own Shape Belts, just like Geo. There are instructions on the Nick Jr site. I made the belts ahead of time (you'll need felt and velcro tape from the craft store), and provided the kids with adhesive foam shapes (also at the craft store).

GOODIE BAGS
We cut out the Team Umizoomi Party Thank You Notes from the web site and attached one per paper bag using a glue stick. There is even a spot on the notes to write each guest's name.

My goal was to find fun things that had to do with shapes, patterns, and numbers for the goodie bags. This was not an easy task so I resorted to:

  • beaded necklaces (they're colorful, and the beads are geometric, right?!)
  • Rubik's-type cubes from the Dollar Spot at Target 
  • a bouncy ball from the party aisle of Target
  • my son's favorite candies
  • the Team Umizoomi Party Placemats (coloring pages and puzzles) from the web site
  • a small box of crayons
  • a LEGO mini figure since my sons and nephew are all LEGO enthusiasts
SNACKS

I wish I had remembered to take pictures of the food! Alas, I was too caught up in the action. Here are some ideas for Team Umizoomi party snacks, sans visual representation.

  • Cheese & Cracker Shapes - cut cheese into triangles and squares; choose crackers in various shapes.
  • Pattern Power Fruit Kebabs - using bamboo skewers, thread a variety of fruit in a pattern of your choosing. Clip the pointy ends off using kitchen shears before serving to children.
  • Shapely Finger Sandwiches - use cookie cutters in a variety of geometric shapes to cut your favorite sandwiches (PB&J, cold cuts, etc.)
  • UmiCar Sandwich - if you want to get a bit more creative than just using cookie cutters, check out this 3-D replica of UmiCar to impress your foodie friends. Ingredients and instructions are listed on the Nick Jr. web site.
  • Bot Sandwich - yet another sandwich option, thanks to our Nick Jr. friends. 
  • Milli Sandwich - a sweet and fruity sandwich for Milli fans. You could probably follow the same "template" to create a Milli Pizza - a ready-baked pizza crust such as Boboli, tomato sauce for her helmet, shredded mozzarella cheese for her face, red peppers and black olives cut to make the features of her face, and maybe a couple of bread sticks covered in tomato sauce for her ponytails.
  • Geo Sandwich - another sweet and fruity sandwich idea.

TIME FOR CAKE
Of course it had to be a Geo cake! Once again, a big thank you to Nick Jr. for providing detailed instructions to decorate this cake. The web site also has instructions for a Milli cake, Bot cake, UmiCar cake, and a variety of cupcakes and character cookies. By request, we had a chocolate cake and homemade cream cheese frosting. 

I recommend sliding a few strips of wax or parchment paper under the edges of the bottom cake layer to protect your platter or cake stand from stray frosting. Once the final frosting-details are complete, just slide the paper away and voila! Your cake stand is clean and pretty.

Of course you'll need party hats for singing "Happy Birthday" and eating cake. Team Umizoomi Party Hats are available as free printables on the web site.
  1. Just print onto white card stock, cut them out, and secure together with double-sided adhesive. 
  2. Punch a small hole (a safety pin works well) on each side of the hat, and feed a length of elastic through one hole; tie a knot to secure on the inside. 
  3. Measure the appropriate length for the elastic by placing the hat on your child's head as a guide. Leave an extra inch; cut the elastic. 
  4. Feed the cut end through the second hole and secure by tying a knot on the inside of the hat.

I hope you enjoy adding these ideas to your Team Umizoomi party. Do you have any other fun ideas to add? Be sure to Post a Comment and share with us! As always, thanks for reading.

Tuesday, January 29, 2013

LEGO Travel Adventure at the National Museum of Play

Do your kids like to play with LEGOs? My boys love to build them, take them apart, and rebuild them. They enjoy setting up LEGO chase scenes with good guys and bad guys. This Christmas, we put together over a dozen LEGO sets. One of my sons decided seven months ago that his sixth birthday party, in June, will be a LEGO party.

They. Love. LEGOs.

This past Sunday we were excited to check out the new LEGO Travel Adventure exhibit at the National Museum of Play at The Strong.

LEGO Travel Adventure has some great photo opps, so be sure to bring your camera. There are minifigures as well as scenic backdrops that are perfect for your little LEGO enthusiast.
Building stations encourage kids over 3 to create their own vehicle that can soar above the clouds, traverse the dessert, or dive into the sea.
Once their masterpiece is finished, kids can take a photo of their creation and choose a virtual backdrop, add their own photo, and then email it to themselves or a family member.
Preschoolers and big kids will enjoy the LEGO DUPLO area where they can build a vehicle and race it to a Japanese castle. The racing ramp includes a rocky ridge, wild waterfall, and a line of lava. 3...2...1...GO!
This Travel Adventure Vehicle can fly through the clouds, sail the sea, or climb mountain roads. Kids can take the wheel as the display screen takes them traveling all over the world, through a variety of terrains. Afterward, my five-year-old told me this was his favorite part.

Display cases around the exhibit room feature LEGO scenes by Master Builders. Check out the Wright Brothers and their plane, Henry Ford's Model T, and the first continental railroad...all built from LEGOs. There are tons of other LEGO vehicles and scenes to admire. My personal favorite is the breakdancing scene. I'm pretty sure they are kickin' some old school Beastie Boys on that boombox.
Just outside the exhibit room, there are more display cases and a race car made from LEGO DUPLO bricks. Kids can even take a turn "driving" the car!
 This minifigure looks familiar...
The National Museum of Play is located at One Manhattan Square in Rochester, NY. It is stroller-friendly, the restrooms are equipped with diaper changing tables, and there are even family restrooms where the main door can be locked. There are two Guest Rest rooms with rocking chairs, books, and some toys; these rooms are perfect for nursing moms or for young kids who need a little break from the excitement. The food court includes several fast food options, as well as some fresh fruit-and-veggie packs from Wegman's in the vending machines. Coolers are not permitted (but truth be told, we usually purchase items for the grown-ups and bring food for our picky kids in an insulated tote bag). Feel free to hang your coats in the new coat room, just behind the library circulation desk; just don't leave behind any valuables.

Have fun at the new LEGO Travel Adventure exhibit! As always, thanks for reading.

Friday, January 25, 2013

Family Fun This Weekend

What's going on in Rochester, NY this weekend? Let's start with today: Happy National Opposite Day! Wait, I mean it's not National Opposite Day. So don't not do the opposite of what you were planning to do.

Saturday is Bald Eagle Appreciation Day. Stop by the Seneca Park Zoo and say hello to our feathered friends there (to the left of the playground).

Sunday is National Chocolate Cake Day. Hmmm...you know what to do!


ONGOING


Race: Are We So Different?
Friday, January 25 - Sunday, April 28 during regular museum hours
Rochester Museum & Science Center, 657 East Avenue, Rochester, NY
Explore the stories of race from biological, cultural, and historical points of view. This new exhibit features hands-on activities, 3-D animation, and more. Included with regular museum admission.


FRIDAY

Game Night
Friday, January 25 from 5:30 - 8:30 p.m. (repeats on Fridays through June 14, 2013)
ArtsROC, 3462 Monroe Avenue, Pittsford, NY
Kids ages 5-12 can enjoy movies, Wii, Xbox, Minecraft, tons of LEGOs, and a pizza party for $25 at ArtsROC. Call (585) 218-9125 or email info@artsroc.net for more information. Or click here to register.

Free Family Night: Make & Take
Friday, January 25 from 4:30 - 10:00 p.m.
YMCA- Southeast, 111 East Jefferson Road, Pittsford, NY
The Adventure Center is open from 4:30-9 p.m. (remember your socks!), enjoy pizza in the Lobby at 5:45 p.m until it runs out ($1/slice) plus ice cream, make a craft, play in the Gym from 6-8 p.m., and swim in the pool from 7-10 p.m. Free and open to the community.

Fun Fridays
Friday, January 25 from 6 - 8 p.m.
YMCA-Westside, 920 Elmgrove Road, Rochester, NY
Family gym games, inflatables, obstacle course, crafts, and family swimming. There is no fee for members; $10 per family for the community.

SATURDAY

Dog Adoption Days in Greece
Saturday, January 26 from 11 a.m. - 4 p.m. (repeats Saturdays: 2/23, 3/30, 4/27, 5/25/ 6/29)
The Mall at Greece Ridge, 271 Greece Ridge Center Drive, Rochester, NY
Meet some of Lollypop Farm's adoptable dogs, and maybe even find your very own canine companion.

Gates Winter FUN Fest
Saturday, January 26 from 6:30 - 8:30 p.m.
Westgate Park, 1489 Howard Road, Rochester, NY
Snowmobile rides provided by the Hilton Sno-Flyers Club, a bonfire, cross-country skiing, children's games (outdoor), and crafts (indoors), plus S'mores and hot chocolate. All games and activities are free; please dress for the weather.

Open Gym & Extreme Sports Practice Night
Saturday, January 26 at 6:30 p.m. (repeats Saturdays through May 25)
Sports Academy of Victor, 6385 Route 96, Victor, NY
Have fun with mats, sports equipment, tumble track, foam pit, turf field, batting cages, spring floor, and inflatables. Instructors are available to help. For ages 6 and up; cost is $10.

SATURDAY-SUNDAY 

Ski, Snowshoe, or Walk the Village & Nature Center
Saturday, January 26 - Sunday, January 27 from 10 a.m. - 5 p.m. (Saturdays & Sundays through Februrary 24, 2013)
Genesee Country Village & Museum, 1410 Flint Hill Road, Mumford, NY
Ski, snowshoe, or hike through the snow-covered village and nature center trails. The Nature Center trails are open 10 a.m. - 5 p.m., while the Historic Village trails are open noon - 4 p.m. only. Call (585) 294-8262 to check trail conditions. Free for members, $5.50 for non-members. Ski rental is $10, snowshoe rental is $5; equipment available on first come, first served basis. Equipment rental is available at the Nature Center.

Meet Pat the Bunny
Saturday, January 26 from 11 a.m. - 5 p.m. and Sunday, January 27 from 1 - 5 p.m.
The Strong National Museum of Play, 1 Manhattan Square, Rochester, NY
Bring your camera and get ready to meet Pat the Bunny! Included with general admission.

SUNDAY

Family Fun Story Time
Sunday, January 27 from 1:30 - 2:15 p.m.
Rochester Public Library (Central Library), 115 South Avenue, Rochester, NY
Families are invited to come to the Children's Center of the Central Library to enjoy family story time for all ages. This program is free, so bring the whole family.


Have a great weekend, and as always, thanks for reading.

Wednesday, January 16, 2013

Tips and Activities for a Road Trip with Kids - Part 3

If you have read parts 1 and 2 in this road trip series, you have some tips to make your journey more enjoyable for all. Hopefully you've started to put together your own Activity Binder, and you have been anxiously awaiting that final page.

Since my boys love hidden picture puzzles and I Spy books so much, I thought a Hidden Object Bottle might be a fun activity in the car. Before assembling the bottle, I lined up the objects to be hidden and snapped a picture and printed it out as the final page in their binder. This way they can cross out the objects - or place a circle sticker on top - as they find them in the bottle.


To make your own Hidden Object Bottle, you'll need the following:

  • one cleaned and dried empty bottle per child (I just used empty soda bottles); plastic is strongly recommended over glass, especially for young children
  • rice (uncooked; hopefully that was obvious)
  • funnel and scooper/measuring cup
  • small objects to hide (I used coins, paper clips, crafting feathers, crafting pom poms, crayons, foam stickers - stick two of the same shapes back to back, and random trinkets from the play room)
Start by dropping one or two objects in, then pour in some rice. Keep alternating a few objects with a layer of rice to cover until all objects are inside. Tap the bottle on a counter to make the rice settle, and add a bit more. I left about an inch of space from the very top. Replace the cap before use.

To play, kids tilt, turn, and shake the bottle to try and uncover all of the hidden objects. Remind the kids NOT to open the bottles. Each time they spot an object, they cross it off (or place a circle sticker over it) on the page in their Activity Binder.

How fun is that?!

I hope these past three posts have been helpful in preparing for any road trips you plan to take with your kids. You could also use the Activity Binder and Hidden Objects Bottle for waiting rooms, short car rides, or just plain old boredom-busters at home.

What keeps your kids busy during long car rides? Post a Comment and let us know.

Happy travels, and as always, thanks for reading.


Link to: Tips and Activities for a Road Trip with Kids - Part 1
Tips and Activities for a Road Trip with Kids - Part 2


Tuesday, January 15, 2013

Tips and Activities for a Road Trip with Kids - Part 2

The first post in this series provided an overview of the top ten things to bring or do to help ensure your kids are occupied and don't even think the words, "Are we there yet?" during your next road trip.

Number ten in that list is an Activity Binder for each child. I came across this idea on Pinterest, and love the one that Gluesticks created. This is a wonderful source of entertainment for kids around ages 2 1/2 and up. You can tailor the activities in each binder according to their age and interests.

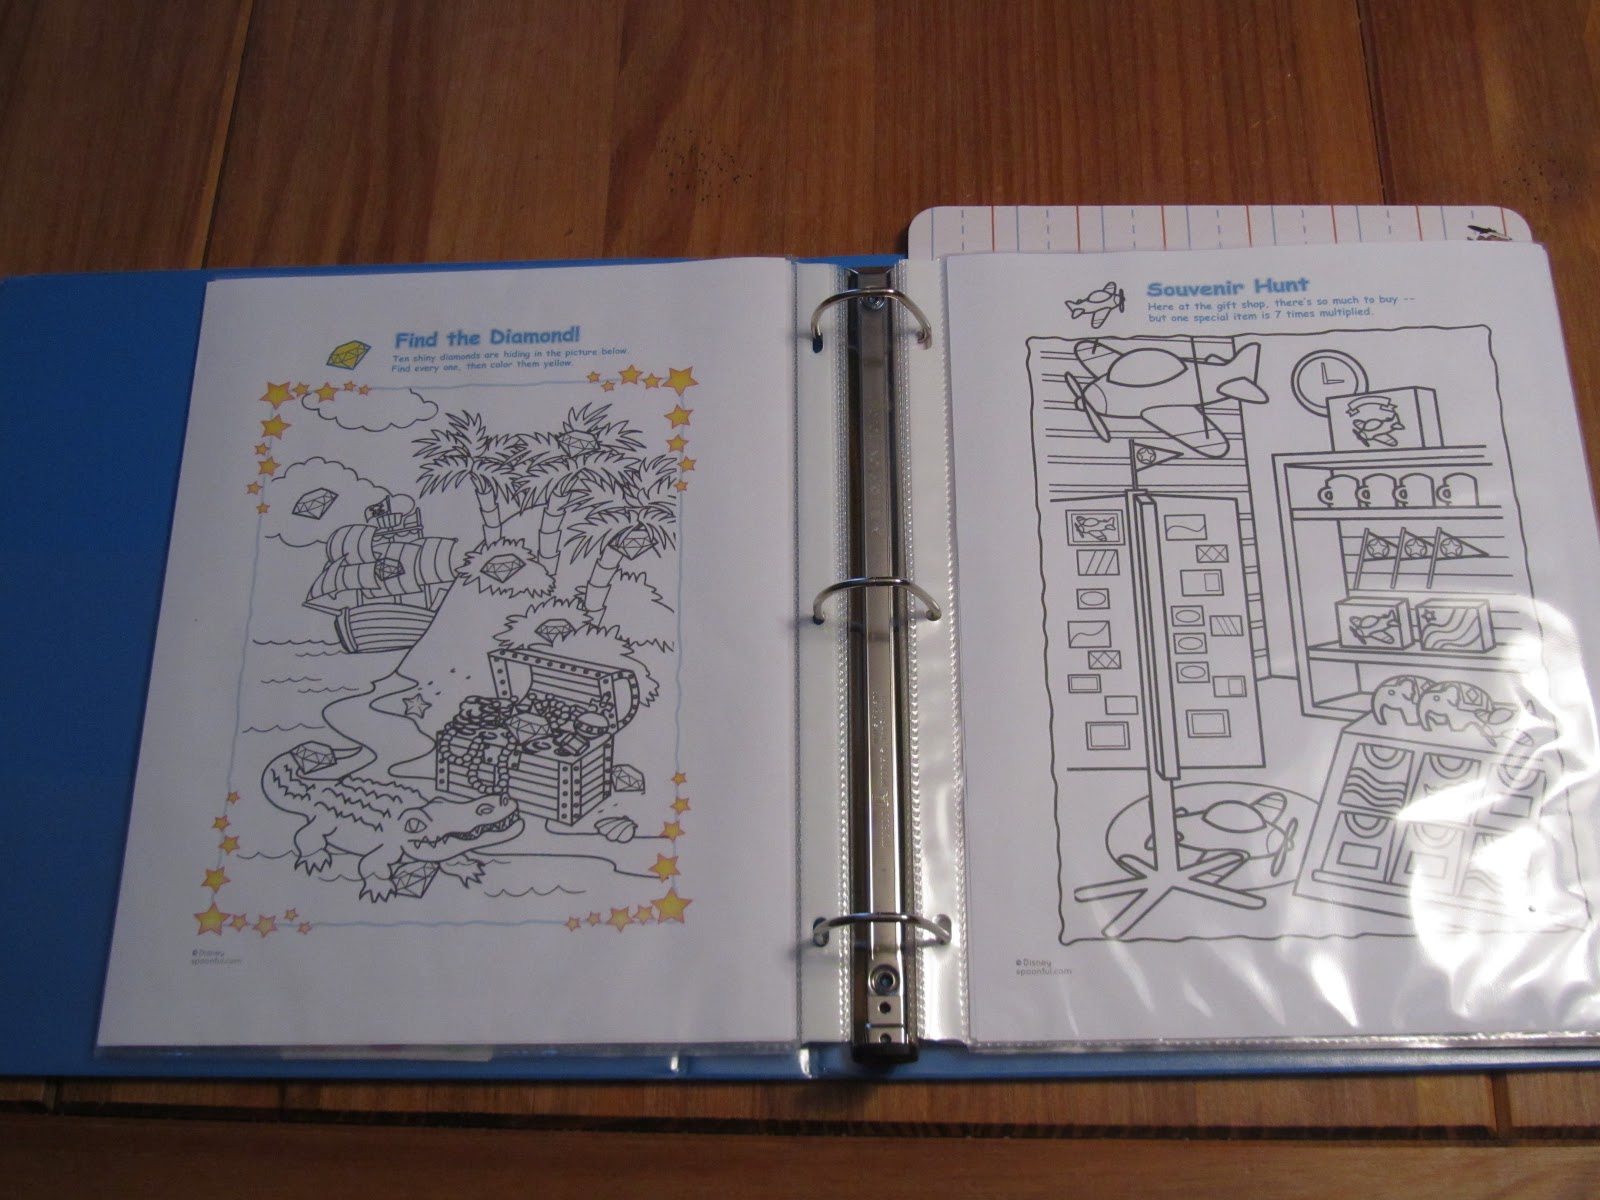
First, you'll need a binder, folder, or clipboard. I picked up a couple of one-inch binders to get started. In the front pocket are colorful circle stickers from the office supply aisle as well as a dry erase markers. For older kids, you might want a few more colors for the markers. All of the activities are in sheet protectors so that they can be reused. The kids can use the dry erase markers to write directly on the sheet protectors, and then erase and write or draw again. The dollar bins at Target had a two-pack of mini, magnetic erasers for dry erase boards. Score! It sticks right to the inner spine of the binder.

Next, I used Google Maps to map out our route. When we hit our 100 mile marks, the kids will get a "reward" and I will help them put a sticker on the map to show how far we have traveled.
For some crazy fun, I printed out some pictures of the family members so they can make silly faces. I went into our photo library on the computer, cropped some pictures to get just the faces, and printed 8x10 copies on regular paper. Slide them into page protectors, and doodle away.
My boys love hidden picture books. So I found a few hidden picture pages on Spoonful.com: here are  pirate treasure and hidden airplane pages. They can use the dry erase markers to circle the objects, or we can slide the pages out for them to color.
Many of the games below came from Prepared Not Scared! Here are links to Slug Bug and Street Sign Tic Tac Toe. We'll probably just look for any cars in the colors on Slug Bug, rather than solely VW Beetles. We will use the circle stickers from the front pockets of their binders to mark off the items they find.
Here is a link for free printable Road Trip Bingo cards. I printed each one at 140% to fill the page (you may have to play with this on your computer). There are six variations for multiple players. You could print them on card stock for durability, or use a page protector and dry-erase markers for longevity of the game. The Alphabet Search was created by Prepared Not Scared!
 "I Spy" can be played as Bingo, or just as a checklist of items to find. Again, we'll use the circle stickers as markers. The connect-the-dots picture can be completed on the sheet protector with the dry erase marker, or we can slide them out to be colored with crayons.
Who doesn't like "Find the Difference" puzzles? I included one from Spoonful, plus a page from their On-the-Go Activity Pack. It is another free printable, and is geared toward children a bit older than mine (preferably those who can read). However, page 3 features Spot-A-Sign and Maze Craze. My young'uns will enjoy those.
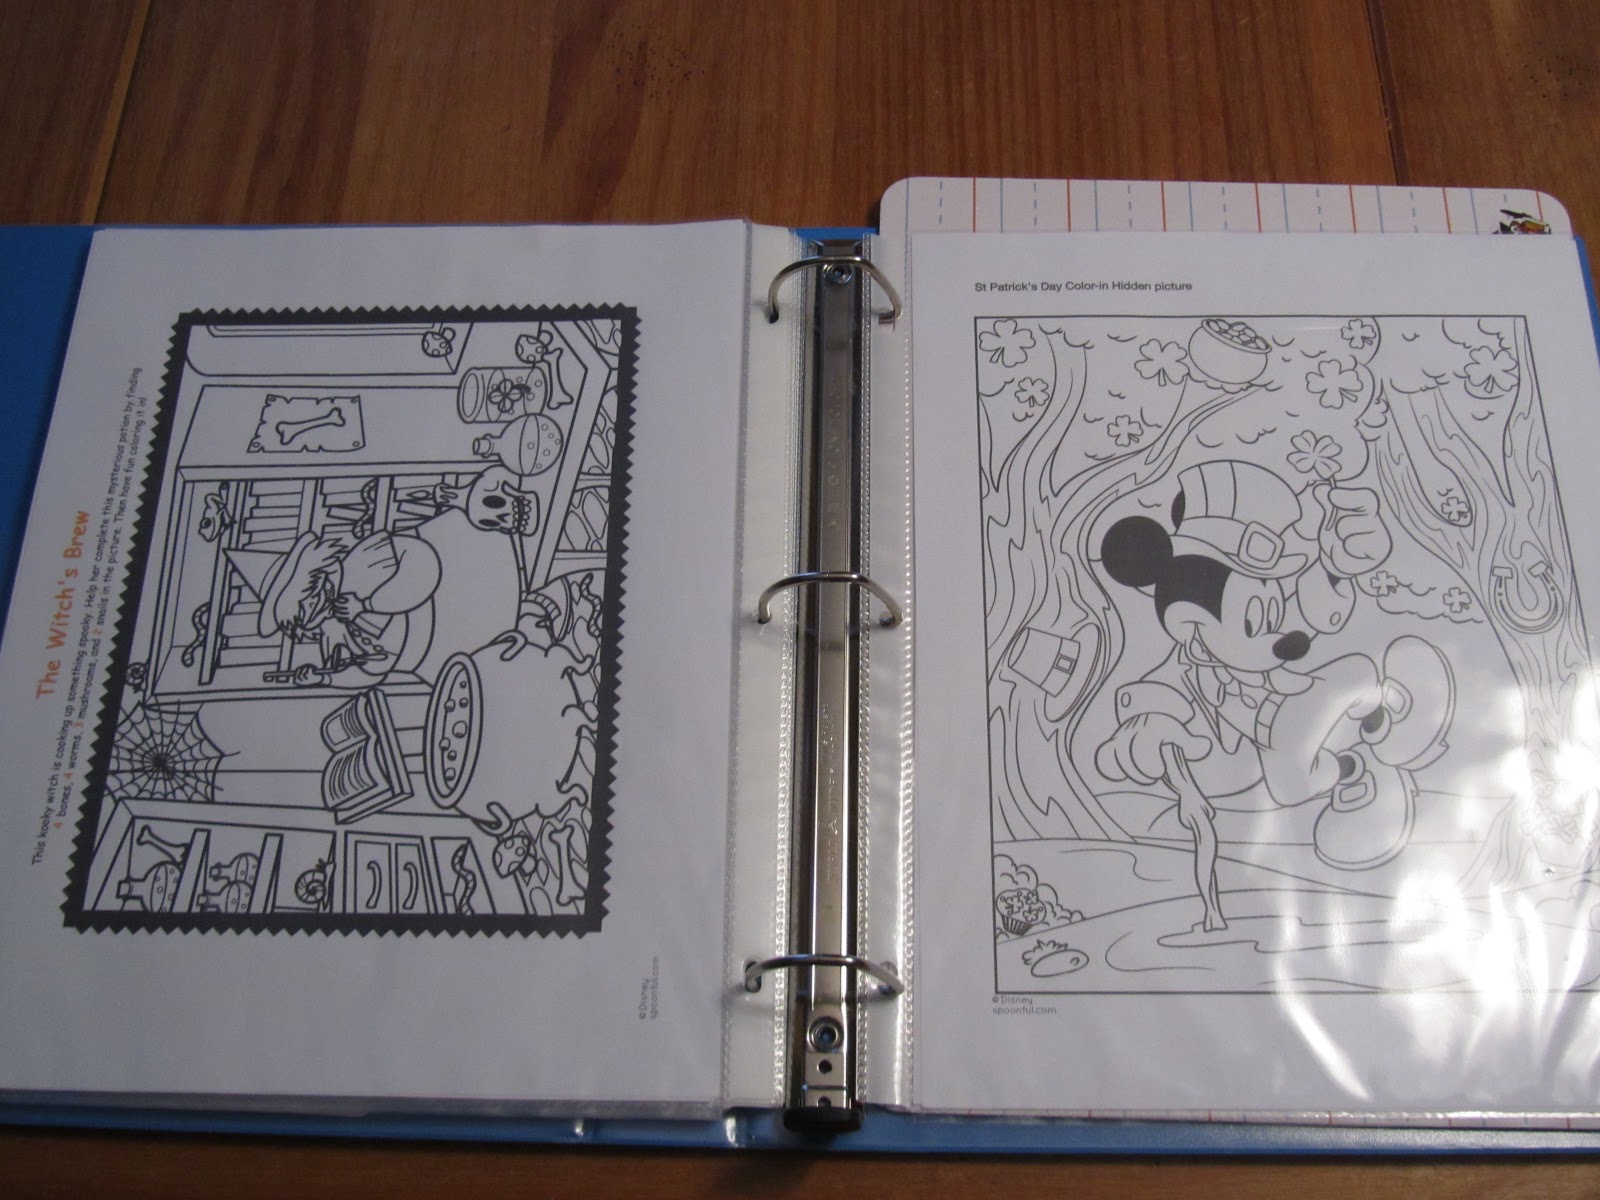
Here are a few more hidden picture puzzles: a witch, and St. Patrick's Day Mickey Mouse.
In the back pocket of the binder, I've included a dry erase board. Once again, Target Dollar Spot to the rescue. One side of the board is ruled, the other is blank. Perfect for doodling, writing, tic tac toe, hangman, and more.

There is one final page in the Activity Binder, but you'll have to wait until the next post to check it out.


I hope you enjoy making an Activity Binder before your next road trip with the kids. What else do you plan to add to your binder? Be sure to Post a Comment and let us know. As always, thanks for reading.


Link to: Tips and Activities for a Road Trip with Kids - Part 1
Tips and Activities for a Road Trip with Kids - Part 3

Blogging tips