Welcome ROCmommas, ROCpoppas, and Friends!

Have fun with your kids - that's what it's all about. If you're looking for fun places to go in Rochester, NY (ROC), awesome
crafts to make, and yummy treats to bake with your kids - as well as some ideas for Date Nights - then you've come to the
right place. Welcome to ROCmomma. Happy reading, and please share your comments. Thank you!

Wednesday, April 17, 2013

To Boston, With Love: Sending Cards to First Responders

My heart goes out to the Boston marathoners and spectators, their loved ones, the first responders, the staff of Massachusetts General Hospital, Boston Children's Hospital, and Brigham & Women's Hospital, and the entire city of Boston. I won't pretend that I can even begin to understand the pain, grief, and anger they feel right now.

We have seen too many senseless, massive tragedies recently; that goes without saying.

First there is the initial shock and denial: "What happened?," and "That couldn't happen." Then the heartache sets in as we realize the enormity and severity of the nightmare. We see images of those who were injured. Maimed. Killed. We despair in the deranged darkness that has seemingly overcome humanity. But we also see the embraces of loved ones reuniting, and there is hope.  We see the bravery of heroes helping others, and we remember there are still good people out there.

Next come the what-ifs. What if my friend had crossed the finish line twenty minutes later than she did? What if that had happened here, in my city? What if my kids and my parents had been waiting at the finish line while my husband and I finished our run (just like we did in September)? What if my boys were in critical condition at Boston Children's Hospital right now?

Then come the unstoppable tears because we come to the conclusion that there is no way to guarantee the safety of our loved ones in this world.

So we hug a little tighter. We say, "I love you," a little more frequently. We are grateful for the time we have with those we love. We try to carry out small acts to remind everyone around us that there are good people in the world. And the good guys always win.

Those small acts of kindness are the basis behind 26 Acts of Kindness, a movement started by Ann Curry of NBC News in honor of the victims of Newtown, Connecticut.

26 Acts of Kindness posted a request on their Facebook page for cards or handwritten letters to show love and support to the Boston community. If you have been asking, "What can I do?," then please consider sending some kind words. 26 Acts of Kindness will forward the cards and letters to the Boston community. Cards and letters may be sent to:

26 Acts of Kindness
PO Box 185083
Hamden, CT 06518
Choosing stickers to decorate some cards.
You may also send cards and handwritten letters directly to some of the first responders who proved that there are superheroes among us:

Boston Fire Department
Attn: Chief of Department
115 Southampton Street
Boston, MA 02118

Boston Police Headquarters
Attn: Commissioner Edward Davis
1 Schroeder Plaza
Boston, MA 02120-2010

EMS Headquarters
Attn: Chief of Department Jim Hooley
785 Albany Street
Boston, MA 02118

Massachusetts General Hospital
Department of Emergency Medicine
55 Fruit Street
Boston, MA 02114

Boston Children's Hospital
Attn: Division of Emergency Medicine
300 Longwood Avenue
Boston, MA 02115

Brigham and Women's Hospital
Attn: Chairman, Emergency Medicine
75 Francis Street
Neville House
Boston, MA 02115

If you want help beyond greeting cards, check out these suggestions from USA Today. While the Red Cross has what it needs to support this tragedy both financially and with an adequate local blood supply, the Red Cross web site offers other suggestions for those who want to provide additional support.

There is a quote by Martin Luther King, Jr. that feels appropriate right now: "Life's most persistent and urgent question is, 'What are you doing for others?'" These are just a few ideas of how we can help those dealing with this tragedy in Boston. Please Post a Comment with your suggestions of other ways to help.

As always, thanks for reading.

Saturday, April 13, 2013

Family Fun This Weekend

Happy National Scrabble Day! Today is a great opportunity to play the 75-year-old game with the family, or just the two of you after the little ones are in bed.

Tomorrow, April 14, is Look Up at the Sky Day. It's a perfect reason to get your kids to do some bird watching, or even just finding shapes in the clouds.

Need some more excitement in your weekend? Well, there are a few things going on as well. Check them out!


ONGOING
  
Race: Are We So Different?
Daily through Sunday, April 28, 2013
Rochester Museum & Science Center, 657 East Avenue, Rochester, NY
Explore the stories of race from biological, cultural, and historical points of view. This new exhibit features hands-on activities, 3-D animation, and more. Included with regular museum admission.

LEGO Travel Adventure
Daily through May 12, 2013
National Museum of Play at The Strong, One Manhattan Square, Rochester, NY
Hands-on LEGO and DUPLO building stations, racing ramps, tons of LEGO displays by LEGO Master Builders, and even a spot to take a photo of your own creation and email it to yourself or friends and family. Included with regular museum admission. Check out the ROCmomma review here.
SATURDAY

Curious George Swings into Spring
Saturday, April 13 from 10 a.m. - 12 p.m.
WXXI Studios, 280 State Street, Rochester, NY
PBS Kids presents hands-on activities, a special episode of "Curious George," and giveaways. This event is free and open to the public.

EcoFest
Saturday, April 13 from 10 a.m. - 2 p.m.
Genesee Community College, One College Road, Batavia, NY
Bring your old electronic devices - including unwanted cell phones, laptops, printers, and ink cartridges - to the eighth annual EcoFest for recycling. You may also bring paperback books, eyeglasses, sneakers, and old flags. A raffle ticket is awarded for each item brought in; the grand prize is a new mountain bike. Plus free tire pressure check, "green" games/activities, a wildlife show at 1 p.m., and food to purchase.

The Kingdom of Grimm
Saturday, April 13 at 11:30 a.m. & 1:30 p.m.
National Museum of Play at The Strong, 1 Manhattan Square, Rochester, NY
A theatrical performance by students from SUNY Brockport based on the folktale The Brothers Grimm. Included with general admission.

Tiny Science NanoDays
Saturday, April 13 from 12 - 4 p.m.
Rochester Museum & Science Center, 657 East Avenue, Rochester, NY
Learn about small-scale science and technology - like the minuscule world of atoms, molecules, and nanoscale forces - in a way that's fun, hands-on, and easy to understand. Included with general admission.

36th Annual RIT Juggle-in-Public Show
Saturday, April 13 at 7:30 p.m.
RIT, Clark Gym, One Lomb Memorial Drive, Rochester, NY
See jugglers from around the nation at this juggling festival. Doors open at 7:10 p.m. Click here for a map, detailed directions, and parking info (Parking Lot D). Tickets are $14 for general public, $10 for RIT staff, students, and seniors (65+), $8 for children ages 10 and under.

Open Gym & Extreme Sports Practice Night
Saturday, April 13 at 6:30 p.m. (repeats Saturdays through May 25)
Sports Academy of Victor, 6385 Route 96, Victor, NY
Have fun with mats, sports equipment, tumble track, foam pit, turf field, batting cages, spring floor, and inflatables. Instructors are available to help. For ages 6 and up; cost is $10.

SATURDAY-SUNDAY 

Saturday, April 13 from 11 a.m. - 4 p.m. & Sunday, April 14 from 12 - 4 p.m.
National Museum of Play at The Strong, 1 Manhattan Square, Rochester, NY
Move like a piece on a giant game board and journey through the history of games in Game Time! Interactive stations include digital party games, racing games, card games, a giant game of bingo, and more. Included with general admission.

SUNDAY

How I Became a Pirate
Sunday, April 14 at 11 a.m. and 2 p.m. (repeats 4/20 at 2 p.m., 4/21 at 11 a.m. & 2 p.m.)
Hart Theater at JCC, 1200 Edgewood Avenue, Rochester, NY
When Captain Braid Beard and his crew invite Jeremy Jacob to join their voyage, it's the swashbuckling time of his life. Based upon the best-selling book by Melinda Long and David Shannon.  Best enjoyed by children ages 4 and up. Tickets are $15 each; you may order tickets online.


Sunday, April 14 from 11 a.m. - 5 p.m.; departures at 12, 12:30, 1, and 1:30 p.m.
New York Museum of Transportation, 6393 East River Road, West Henrietta, NY
Purchase your tickets, then explore the train cars, antique cars, fire truck, and the model trains in the museum. At your departure time, board the trolley and enjoy the 1-mile ride to the Rochester & Genesee Valley Railroad Museum. Explore the second museum before boarding for a ride back to the Museum of Transportation. No reservations required.

Billy Kelly and The Blahblahblahs in Concert
Sunday, April 14 at 11 a.m. - 12:30 p.m.
The Little Theatre, 240 East Avenue, Rochester, NY
Join WXXI for a special children's concert with singer/songwriter Billy Kelly and the Blahblahblahs. Doors open at 10 a.m. and the concert starts at 11 a.m. Tickets - available at 10 a.m. - are $25 for a family four-pack, $7 for additional kids tickets, and $10 for additional adult tickets.


Family Fun: Craft
Sunday, April 14 from 1:30 - 4:30 p.m.
Rochester Public Library (Central Library), 115 South Avenue, Rochester, NY
Families are invited to come to the Children's Center of the Central Library to create a beautiful magnetic handprint for Earth Day. This program is free, so bring the whole family. No registration required.

Have a great weekend! As always, thanks for reading.


Wednesday, April 10, 2013

Kids Birthday Party: Race Cars

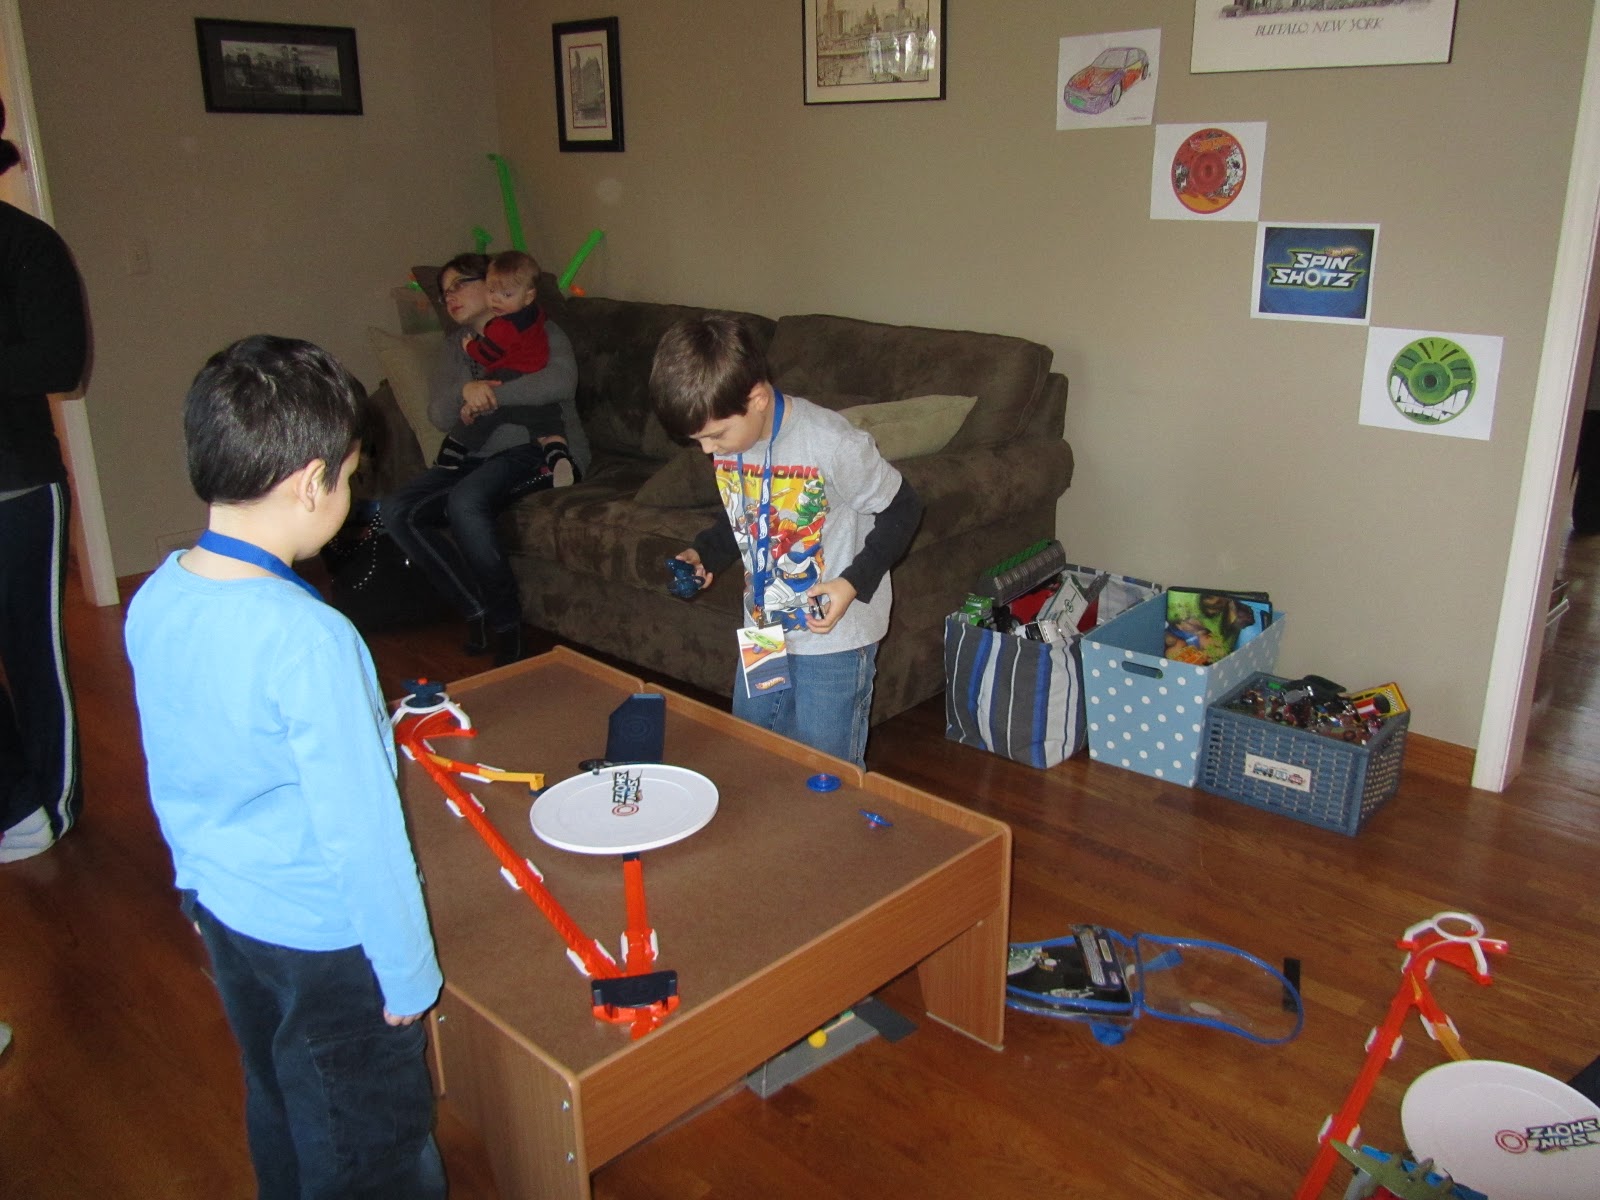
Last month we had the opportunity to host a Hot Wheels Spin Shotz House Party. That means we received a free party kit filled with Spin Shotz discs and race tracks, as well as some other party swag. Then we invited a bunch of friends to come over and play, and tell us what they thought of the toys.

The party planner in me approached this like a birthday party, so allow me to share the details for anyone looking to plan a race-themed birthday party in the near future. This could be easily adapted to any type of race-themed party, such as a race car party.

INVITATIONS

You could purchase race- or car-themed invitations, or you and your child can make your own with the help of some themed stickers such as checkered flags and race cars, along with some paper in the birthday child's favorite color.

DECORATIONS

I found a multi-colored pennant banner on clearance at Target and thought it was great for our theme. We hung it in our front hallway. Black and whited checkered pennants would have been perfect, but how could I pass up something similar on clearance?

We taped a black plastic tablecloth to the floor, using tons of tape on the perimeter's underside to keep it secure. We used additional strips of masking tape on top to create the dashed line of our roadway.
PARTY SWAG

Upon arrival, our guests were greeted with a personalized VIP badge on a Hot Wheels lanyard, thanks to our Spin Shotz party kit. And what is a race party without VIP badges? You can make your own ahead of time by purchasing lanyards with clips (found at office supply stores) and printing your own badges on card stock. Check out this template and download a free printable Spin Shotz badge.
PARTY GAMES

The most valuable thing I learned during student teaching was to change the stimulus every 15 minutes.  This is true in the classroom, at home on rainy days, and even at parties.

0:00 - 0:30          Free Play

  • Allow enough time for all guests to arrive before the structured activities begin.
  • Be sure there are enough race cars - or in this case, Spin Shotz discs - for each child to play.
  • Inspire some creative play by using low-tack painter's tape on the floor to create roads, parking lots, etc.
  • Set up a quiet activity for those who are shy and need to warm up to more active play; some coloring pages and crayons are a great option.

0:30 - 0:45          Let the Races Begin

You could get elaborate and create a tournament bracket for a super-fun racing showdown. Or set up a few race tracks and encourage the kids to race each other.
0:45 - 1:00          Go Off the Track

Provide the kids with props to create their own obstacles and stunts for the race cars or Spin Shotz discs. Props could include cardboard boxes in a variety of sizes, plastic cups, dominoes, building blocks, LEGOs, even a stack of books.


1:00 - 1:15          Pit Stop

Every race car needs to refuel, so set up a Pit Stop for your little racers. Our party was on a weekday morning from 9 - 11 a.m., plus there were some severe food allergies to consider, so our snack options were grapes, animal crackers, and fruit leather. Depending on the ages of the children, this might be a good opportunity to encourage a trip to the potty.
1:15 - 1:30          Arts & Crafts

Since we were having a Spin Shotz party, a spin art craft seemed appropriate. I had seen this idea a few times on Pinterest, so we gave it a whirl. You'll need:
  • salad spinner
  • washable tempera paints
  • white paper, trimmed ahead of time to circles that will fit in your salad spinner
  • masking tape
  • diaper wipes or wash cloths for quick clean-ups
Fold a piece of tape into a roll and use it to secure a paper circle to the bottom of the salad spinner. One at a time, help the kids drip a few blobs of tempera paint onto their paper (near the center works best) and place the top on the spinner. Let the kids operate the spinner...


...and voila!
1:30 - 1:45          Pin the Wheel on the Race Car

Who doesn't love a good round of pin-the-blank-on-the-blank? If this game goes too quickly, give the kids another chance to race on the tracks or on their obstacle courses.

1:45 - 2:00          Hot Car

Play "Hot Potato" with a race car or a Spin Shotz disc. Have the kids sit in a circle and hand one child a race car. Play some music and have them pass the car to their left until the music stops. When the music stops, the child holding the car is out. Once a child is out, give him or her a goody bag. Keep going until there is one child left (or until everyone has lost interest), and be sure everyone has a goody bag. Be sure to thank your guests for coming.


The boys had a great time playing at our Spin Shotz House Party. I hope these ideas are helpful, and that your party is just as amazing. As always, thanks for reading.


Disclaimer: While I received the Spin Shotz products for free, I did not receive compensation for this post. All opinions are actually mine.

Tuesday, April 9, 2013

How to Decorate an R2D2 Cake

When I asked my five-year-old what kind of birthday cake we should make for daddy, I should have known the response would be Star Wars-related.

It seems like Star Wars has captivated another generation; it is the current hot topic among Kindergarten boys. They know the plot lines of every episode of Clone Wars. They know which level their friends have beaten in Angry Birds Star Wars. They are constantly asked to stop humming Darth Vader's theme or pretending to shoot battle droids at school. They all want the LEGO Death Star (suggested retail: $399.99!) for their birthdays.

Really, it's no wonder my son declared that daddy needed an R2D2 cake.

Wilton used to make a wonderful R2D2 cake pan. Unfortunately it has been discontinued, and a search on Amazon yielded a used pan for $73.99. I wouldn't pay anywhere near $74 for a new R2D2 pan; is there really someone who would pay that much for a used one? Crazy.

Instead, here are the steps to make your own R2D2 cake, sans fancy pan.

Step 1: The Cake

First, prepare a cake from a packaged mix or from your favorite recipe, and divide the batter between a  round pan and a square pan. I used a 7" round pan and an 8"x8" square pan.

Once baked and cooled, cut the round cake in half and place on a large platter or baking sheet. Line up the square layer and trim a strip from the side and one from the bottom to make the two arms. Cut the remaining half of the round layer into thirds to make the feet.
Slide some strips of waxed paper under the edges before frosting your cake. This step will protect your serving platter from stray drips of frosting. When the paper is removed, all evidence of the mess will be gone as well. Yay.

Step 2: The Frosting

Next, you'll need a batch of your favorite white frosting (about 3 cups or more), or two tubs of white store-bought frosting. I used homemade cream cheese frosting, but buttercream also works well. Reserve half of the frosting as plain white.

Place remaining half of frosting into a bowl and add a few drops of blue food coloring; stir until evenly colored (Lightest Blue). Scoop three-quarters of the Lightest Blue into another bowl; add more blue food coloring and stir until evenly colored (Blue #2). Scoop two-thirds of Blue #2 into another bowl; add more blue food coloring and stir until evenly colored (Blue #3). Scoop one-half of Blue #3 into another bowl; add more blue food coloring and a squeeze of black decorator icing and stir until evenly colored (Darkest Blue).
From left to right: Darkest Blue, Blue #3, Blue #2, and Lightest Blue.
Step 3: Pretend You Know What You're Doing

While the Wilton pan is no longer available, you can still download the decorating instructions from their web site. Those instructions might be slightly more irritating than listening to Jar Jar Binks.

Luckily, this blog post from Way More Homemade provided detailed instructions that are actually useful.

Scoop some of Blue #2 or Blue #3 into a pastry bag or another decorator tool. Using the finished photo (near bottom) as a guide, or another photo of your choosing, draw the basic shapes on R2D2's body.
Doesn't that look amazing? Yeah, I was about ready to go buy a cake at this point. Any cake. But, do. Or do not. There is no try.

Use white or Lightest Blue frosting to cover all sides of the cake, except for the surface where your lines are drawn.

Use Lightest Blue and a pastry bag or other cake-decorating device to fill in the squares near the bottom of R2's body and the outer parts of his "joints," as shown below. Does yours look as pretty as mine? Are you nervous? Just stay with me. It will be great.
Use Blue #3 and Darkest Blue to fill in the shapes on R2's head and the remaining shapes on his body, as well as the "shadow" at his inner shoulders (gives it a little dimension), as shown below.

Use Blue #2 to fill in the rest of R2's head. Then use a tube of black decorator icing to outline all of the shapes, as shown below. See? Looking better already. Sort of.
Fill a pastry bag or decorator tool with white frosting and fill in all remaining areas. Use two red candies as the lights on R2's head. Ha! Now you can actually tell that it's R2D2! Told you it would be great.
 See how easy? You can do this too for your favorite Fanboy or Fangirl.
Happy decorating! As always, thanks for reading.


Tuesday, March 26, 2013

Easter Games for Kids

Here in Rochester - and most of the northeast - we will not be having an outdoor egg hunt on Easter. The snow is melting, but the ground is soggier than your socks after some puddle jumping.

In preparation for our indoor festivities, my five-year-old helped me put together some fun, kid-tested, and kid-approved Easter games. We hope you find them helpful in planning your Easter festivities.

1. Egg Hunt
Players go on a scavenger hunt to find eggs, eggs, and more eggs!

Materials needed:

  • plastic eggs
  • small age-appropriate prizes or treats to place in the eggs (optional)
  • baskets or containers for each player

To keep the hunt fair for all ages, one egg-hunt method is to hide different color eggs for each player. When the hunt begins, players must only find their own color eggs and put them in their basket; they leave the other color eggs alone.

Another method is a group egg hunt. Hide clues in the eggs - instead of or in addition to the treats, with the final clue leading them to their Easter baskets. Be sure to have one clue ready to direct them to the first egg.

Or, you could go the more traditional route of hiding a ton of eggs and letting the kids go crazy.

2. Egg Tac Toe 
Toss plastic eggs and try to get them into 3 cups in a row

Materials needed:

  • 1 empty box
  • 9 plastic cups
  • glue gun, glue dots, or craft glue
  • green construction paper
  • scissors

Use glue to adhere cups into the empty box.
Cut slits into green paper to make grass; glue onto outer sides of box, overlapping pieces of paper as necessary.
Player tosses plastic eggs and tries to get them into three cups in a row. Depending on ages of children playing, you can limit the number of eggs they toss. For younger kids, let them keep going until they get it...and everyone is a winner.
3. Bocce Eggs
Roll plastic eggs and try to get your egg closest to the center target.

Materials needed:

  • painter's tape
  • plastic eggs (a different color per player)
Use painter's tape to create your target on the floor. Each player gets 3 plastic eggs of the same color (a different color for each player). Players take turns rolling one egg at a time, trying to get closest to the center. The egg closest to the center wins. Variation: Assign each area of the target a different number of points; add up each player's points to determine the winner.


4. Egg Race
Players use a straw to blow their plastic egg from the starting line to the finish line.

Materials needed:

  • plastic straw for each player
  • plastic egg for each player
  • painter's tape
Use painter's tape to mark the starting and finish lines. Give each player a straw and a plastic egg. Say, "Ready, set, go," to start the race. Players use their straw to blow their egg across the finish line.

5. Egg-on-a-Spoon Race
Players try to be the first one to cross the finish line, without letting their egg fall off the spoon.

Materials needed:

  • painter's tape
  • spoon for each player
  • plastic egg for each player
Mark a start and finish line on the floor with painter's tape, or use the same set up as the Egg Race, above. Each player puts a plastic egg on his or her spoon and then stands on the starting line. Say, "Ready, set, go," to start the race. Players walk to the finish line; if an egg falls off the spoon, the player picks up the egg and goes back to the starting line to try again.

6. Bunny Hop Relay
Players hop to a basket with an egg under their chin, and drop the egg in to fill the basket.

Materials needed:
  • 2 baskets per team
  • plastic eggs
  • bunny ears (optional)
Divide players into two teams (for younger kids or a small group, you may want to just play together on one team...more of a team-building game rather than a competitive game). Place a basket full of plastic eggs near the players; place an empty basket on the other side of the room. Say, "Ready, set, go," to begin the game. Players take turns placing an egg under their chin, hopping with it to the empty basket, and dropping the egg into the basket. That player hops back, and the next player goes. In a competitive version, the game ends when one team fills their basket. In a team-building version, the game is over when all the eggs are in the second basket.


7. Easter Moves
Players show off their moves, and shake out their sillies by picking two cards and following the instructions.

Materials needed:
  • 2 baskets
  • 2 colors of construction paper, 2 sheets each
  • scissors
  • marker
  • Easter-themed stickers
Cut each sheet of paper into roughly 2.5" x 2.5" squares. On one color, write a number from one through six on each square. There will be multiple copies of the same number. On the other color, use the Easter-themed stickers to put an image on each square; we used bunnies, chicks, eggs, and flowers. Fold the squares and place them in a basket, keeping the colors separate. 

Each player selects one card from each basket and follows the instructions. In our game, the stickers represent the following:
  • Bunny sticker = hop
  • Chick sticker = flap your wings and say, "Tweet!"
  • Egg sticker = roll on the floor (or a somersault)
  • Flower = do a crazy shake
For example, if a player picks a number "2" card and a "Bunny" card, he or she must hop like a bunny two times. Continue until all of the cards have been used.

8. Bunny
This game is similar to Cootie, except players are building an Easter bunny instead of a bug.

Materials needed:

  • white card stock (6-7 sheets)
  • construction paper: pink, black, and assorted colors for the bows
  • scissors
  • pencil
  • black marker
  • 1 glue stick per player
  • 1 white paper plate per player
  • 1 die
  • markers or crayons for each player
Use the card stock, construction paper, pencil, marker, and scissors to make features for the Bunnies: eyes, noses, cheeks, mouths with tongues/teeth, ears, and bows. This was my free-hand guide:

To play, each player will need a paper plate and a glue stick. Everyone takes turns rolling the die and selecting a feature for their bunny based on the number rolled:
  1. Eyes
  2. Nose
  3. Cheeks
  4. Mouth
  5. Ears
  6. Bow
As each feature is acquired, the player glues that piece onto their plate to create a Bunny face. Continue playing until everyone completes his or her Bunny. Provide crayons or markers at the end to add whiskers or other details.

9. Easter BINGO
Use jelly beans as Bingo markers and try to get five in a row.

Materials needed:
  • Easter-themed Bingo cards and calling cards (free download)
  • jelly beans for each player
Each player gets a Bingo card and some jelly beans; everyone places a jelly bean on Free Space. Use the calling cards to call out an object and players place a jelly bean on the matching square on their own card. First player to get five in a row wins (and all players get to eat their Bingo markers at the end). 


10. Pin the Nose on the Easter Bunny
Just like Pin the Tail on the Donkey!

Materials needed:
  • Easter Bunny face (hand-made or purchased decoration)
  • pink construction paper
  • scissors
  • masking tape
  • blindfold
Use the pink paper and scissors to cut enough noses for each player; place a roll of masking tape on the back of each nose. Hang the Easter Bunny face low enough that the players can reach easily. Players take turns getting blindfolded (optional for younger players), spun around, and then trying to place the nose on the Bunny - as close to the real nose as possible.

Whether you have a winner for each game, or make everyone a winner for participating, we hope these games provide tons of entertainment and laughs at your Easter celebration. As always, thanks for reading.

Friday, March 22, 2013

Family Fun This Weekend

Once again, here is your guide to fun for this weekend. But first, a look at the bizarre things to celebrate over the next few days:

Did you know that today, Friday, March 22, is National Goof Off Day? Be sure to relax and do something fun!

Grab your favorite tortillas and salsa (or kettle chips and onion dip) because Saturday, March 23 is National Chip and Dip Day.

Make a yummy snack mix on Sunday, March 24 for National Chocolate Covered Raisin Day. Throw in some dried fruit, mini pretzels, and of course some chocolate-covered raisins.


ONGOING
  
Race: Are We So Different?
Daily through Sunday, April 28, 2013
Rochester Museum & Science Center, 657 East Avenue, Rochester, NY
Explore the stories of race from biological, cultural, and historical points of view. This new exhibit features hands-on activities, 3-D animation, and more. Included with regular museum admission.

LEGO Travel Adventure
Daily through May 12, 2013
National Museum of Play at The Strong, One Manhattan Square, Rochester, NY
Hands-on LEGO and DUPLO building stations, racing ramps, tons of LEGO displays by LEGO Master Builders, and even a spot to take a photo of your own creation and email it to yourself or friends and family. Included with regular museum admission. Check out the ROCmomma review here.
FRIDAY

Game Night
Friday, March 22 from 5:30 - 8:30 p.m. (repeats on Fridays through June 14, 2013)
ArtsROC, 3462 Monroe Avenue, Pittsford, NY
Kids ages 5-12 can enjoy movies, Wii, Xbox, Minecraft, tons of LEGOs, and a pizza party for $25 at ArtsROC. Call (585) 218-9125 or email info@artsroc.net for more information. Or click here to register.

Free Family Night: Family Kickball
Friday, March 22 from 5:30 - 9:00 p.m.
YMCA- Southeast, 111 East Jefferson Road, Pittsford, NY
The Adventure Center is open until 9 p.m. (remember your socks!), enjoy pizza in the Lobby at 5:45 p.m until it runs out ($1/slice), join in a Family Kickball Game at 6:15 p.m., and swim in the pool until 9 p.m. Free and open to the community.

SATURDAY

Easter Egg Hunt and Pancake Breakfast 
Saturday, March 23 from 10 a.m. - 12 p.m.
YMCA Camp Arrowhead, 20 Arrowhead Road, Pittsford, NY
Enjoy a yummy pancake breakfast, meet the Easter bunny, play games, make arts & crafts, and more. There will be two separate egg hunts - one for ages 5 and under, and one for ages 6 - 12. Register online or at the Southeast YMCA (111 E. Jefferson Road, Pittsford, NY) up until March 22nd; $7.50 per person or $32 per family (up to six people). Registration at the event is $12 per person or $45 per family (up to six people). Children under age two are free and should be included in the family count. This event is open to the community; you do not have to be a member of the YMCA.

Easter Party
Saturday, March 23 from 10 - 11:30 a.m.
Created by Us Ceramic Studio, 3 Railroad Street, Fairport, NY
Join the Easter Party for an Easter Egg Hunt, pottery painting, and cookie decorating. Open to ages 5 and up for $20 per child. Younger children welcome with an adult. Reservations required: (585) 223-8210.

5th Annual HUGE Easter Egg Hunt Benefit
Saturday, March 23 at 11:00 a.m.
Bloomfield Elementary School, 45 Maple Avenue, Bloomfield, NY
Three indoor Easter Egg Hunts for ages 0-3, 4-8, and 9 & up, with over 4000 eggs and 3 prize baskets per age group. All participants win a prize bag filled with goodies. Take pictures with the Easter Bunny,  play in the bounce house, or stop by the bake sale, carnival games, crafts, and face painting.  Admission is a $3 donation per child; donations benefit the Patrick Parrish Memorial Scholarship Fun in memory of a local student.

Meet LEGO Easter Bunny
Saturday, March 23 from 12 - 3 p.m.
ArtsROC School of Art, Music, & Language, 3462 Monroe Avenue, Pittsford, NY
Bring your 5-cent recyclables to ArtsROC to help support Catherine's Peace Team with your donation. You'll have a chance to get your picture taken with LEGO Easter Bunny, take home a free LEGO chocolate, and help build a LEGO Easter scene. 

Open Gym & Extreme Sports Practice Night
Saturday, March 23 at 6:30 p.m. (repeats Saturdays through May 25)
Sports Academy of Victor, 6385 Route 96, Victor, NY
Have fun with mats, sports equipment, tumble track, foam pit, turf field, batting cages, spring floor, and inflatables. Instructors are available to help. For ages 6 and up; cost is $10.

SATURDAY-SUNDAY 

Saturday, March 23 - Sunday, March 24, 10 a.m. - 4 p.m.
Various Locations Throughout New York State (use the zip code search to find a location near you)
Enjoy a pancake breakfast, or just find out how maple syrup gets from a tree to your table, at one of the many Maple Weekend celebrations in New York. Several locations also have activities for kids, such as  Genesee Country Village & Museum. Check out ROCmomma's review of Maple Weekend 2012 here.

Saturday, March 23 from 11 a.m. - 5 p.m. and Sunday, March 24 from 1 - 5 p.m.
National Museum of Play at The Strong, One Manhattan Square, Rochester, NY
Meet Martha the Talking Dog, and enjoy story time featuring Martha books. Don't forget your camera! Included with regular museum admission.

SUNDAY

Annual Easter Egg Hunt
Castle Creek Farm, 3760 Rush Mendon Road, Mendon, NY
Sunday, March 24 from 11:30 a.m. - 4 p.m.
Easter Egg Hunt from 12 - 12:30 p.m. is held in the indoor ring and outdoor facilities (rain or shine). Get your picture taken with the Easter Bunny, go on a pony ride, make arts and crafts, enjoy face painting, and check out the farm and petting zoo. Homemade baked goods and snacks will be available.  Admission is $8 per child, or $5 per child for families with 2 or more children.

Salseros
Sunday, March 24 from 12 - 3 p.m.
Rochester Museum & Science Center, 657 East Avenue, Rochester, NY
Experience Hispanic culture through dance with the University of Rochester's Spanish and Latino American Student Association. Included with general admission.

Family Movie Day: Wreck-It Ralph
Sunday, March 24 from 1:30 - 3:00 p.m.
Rochester Public Library (Central Library), 115 South Avenue, Rochester, NY
Families are invited to come to the Children's Center of the Central Library to watch Wreck-It Ralph (rated PG). This program is free, so bring the whole family. No registration required.

Have a great weekend! As always, thanks for reading.

Wednesday, March 20, 2013

Blackberry Chocolate Cheesecake

That's right. Blackberry. Chocolate. Cheesecake. Yep; I went there.

Recently, we were headed to my mother-in-law's for her birthday. I volunteered to bring a cake, but I was in the mood for something other than your basic layer cake with frosting. Don't get me wrong; I could eat frosting by the spoonful. But a few weeks before, I had made these amazing six-layered cheesecake cupcakes and couldn't wait to try something similar.
Rainbow layers of cheesecake-goodness. Mmmmm...
I knew the birthday girl likes cheesecake and chocolate, and that her favorite color is purple. It seemed obvious to have a chocolate crust, a layer of chocolate cheesecake, and a layer of purple cheesecake. To add a little kick, blackberry preserves seemed like the right choice.

First, wrap your springform pan in aluminum foil, to protect it later in the water bath. Next is the  chocolate graham cracker crust which gets pressed into the bottom and sides of the pan. Then the blackberry preserves get heated in the microwave until liquified and easily spreadable on top of the crust. Stick the pan in the fridge at this point while preparing the remaining layers.
Next comes the creamy cheesecake filling.
Then the fun part! Divide the layers and start adding the mix-ins. I kept one white layer for the top, to cover up the surprises beneath. Two layers were dyed purple with food coloring, and the last layer was mixed with 2 ounces of melted chocolate.
Time to layer: spread the filling carefully, one layer at a time. Try to get all the way to the edges.
Keep layering. Then place the pan into a water bath and into the oven for 50 minutes.
After the 50 minutes are up, turn off the oven and open the door for one minute to cool a bit. Then close the door again and leave the cheesecake alone for one hour. Cool on a wire rack for 30 minutes, then refrigerate (loosely covered) for at least four hours. Run a thin knife around the edges to loosen the cake, unmold, and transfer to a serving plate.
Slice cheesecake with a thin non-serrated knife; wipe clean after each cut. If you have difficulty cutting, dip the knife in hot water before each cut. (Ugh! I can't believe this came out so blurry!)
Enjoy the deliciousness. Yum!

Blackberry Chocolate Cheesecake
Serves 12


Hands-on Time: 30 minutes
Baking Time: 50 minutes
Cooling/Chilling Time: 5 hours


30 chocolate graham cracker squares
1/2 c. unsalted butter (1 stick), cut into chunks
12 oz. seedless blackberry preserves
3 8 oz. pkgs. cream cheese* (24 oz. total), softened
3 eggs
1 c. sugar
1 1/2 c. sour cream**
1/2 tsp. vanilla extract
1/4 c. semi-sweet chocolate chips

1. Remove cream cheese packages from refrigerator and keep at room temperature to soften while preparing everything else. Preheat oven to 325 degrees Fahrenheit. Prepare a 9-inch springform pan by wrapping the bottom with aluminum foil. Have a roasting pan ready for the water bath; set aside.

2. In a food processor, pulse graham crackers until they are crumbs.
KIDS CAN HELP: Carefully put graham crackers into the food processor (keep it unplugged while the blade is exposed). Once closed, kids can push the button to turn on/off the food processor.

3. Melt butter in the microwave: 30 seconds, stir, 15 seconds, stir. Continue in 15-second intervals until melted. Pour into food processor with graham cracker crumbs; pulse until crumbs are moistened.
KIDS CAN HELP: Carefully pour the butter into the food processor, and push the pulse button once the food processor is closed.

4. Pour crumbs into prepared pan and use the smooth bottom of a glass to press down into the base and about one inch up the sides.
KIDS CAN HELP: Pour crumbs into pan.

5. Heat preserves in the microwave: 30 seconds, stir, 15 seconds, stir. Continue in 15-second intervals until liquified and spreadable. Pour into crust and carefully spread around to edges. Refrigerate while preparing cheesecake filling.

6. In the bowl of an electric mixer, beat softened cream cheese on low for 2 minutes, until free of lumps. Add eggs, one at a time, and continue to beat on low until combined.
KIDS CAN HELP: Dump cream cheese into bowl; pour eggs into bowl (TIP: For less mess, crack an egg into a cup and let the kids use the cup to pour the egg into the bowl.)

7. Add sugar, sour cream, and vanilla. Continue to beat 1-2 minutes until well combined but not over-beaten, scraping down sides of bowl as necessary.
KIDS CAN HELP: Add ingredients to the bowl.

8. Meanwhile, using a tea kettle or pot, start boiling water for the water bath.

9. Pour 3/4 of the cheesecake filling into a separate bowl, reserving 1/4 of the filling in original bowl [BOWL #1]. To the 3/4 of the filling, add 2 drops each of red and blue food coloring; mix until blended evenly.
KIDS CAN HELP: Stir the mixture until the color is even.

10. Pour 2/3 of the purple filling into another bowl, reserving 1/3 of the light purple [BOWL #2]. To the 2/3 of the filling, add 3 more drops each of red and blue; mix until evenly blended.
KIDS CAN HELP: Stir the mixture until the color is even.

11. Pour 1/2 of the dark purple into a separate bowl, reserving 1/2 as dark purple [BOWL #3]; the other 1/2 will become chocolate-dark purple filling [BOWL #4]. In a separate microwave-safe container melt chocolate chips in the microwave: 30 seconds, stir, 15 seconds, stir. Continue in 15-second intervals until melted. Temper the chocolate by adding a few spoonfuls of dark purple cheesecake filling from Bowl #4 into the chocolate. Stir and then pour this mixture into Bowl #4; stir to mix evenly.
KIDS CAN HELP: Measure chocolate chips into microwave-safe container. Kids can also stir the chocolate-cheesecake mixture until fully combined.

12. Remove pan from refrigerator; carefully spread contents of Bowl #4 (chocolate-dark purple) evenly over the blackberry layer, spreading to the edges. Next, carefully spread contents of Bowl #3 (dark purple) evenly over the chocolate layer, spreading to the edges. Then carefully spread contents of Bowl #2 (light purple) evenly over the dark purple layer, spreading to the edges. Lastly, carefully spread contents of Bowl #1 (white) evenly over the light purple, spreading to the edges.

13. Place filled springform pan inside a larger baking pan or roasting pan. Carefully pour boiling water into baking pan until halfway up the sides of the cheesecake pan. Bake 50 minutes. Do not over bake; the cheesecake will still jiggle but will firm when chilled.
KIDS CAN HELP: Set the timer.

14. Turn off oven and leave door open for one minute to cool slightly. Close over door and let cheesecake rest for one hour.

15. Remove cheesecake from oven and from water bath. Let cool 30 minutes on wire rack. Loosely cover and refrigerate at least four hours.

16. Run a thin knife around edges to loosen from sides; unmold and transfer to a serving plate. Slice cheesecake with a thin non-serrated knife, wiping after each cut. If it is difficult to slice, dip knife into hot water and wipe dry before each slice. Enjoy!

* TIP: I used 1 package of fat free cream cheese and 2 packages of reduced fat cream cheese.
** TIP: I used reduced fat sour cream. Using all fat-free dairy products will affect the texture of the cheesecake filling; I recommend reduced fat instead.


This is such a delicious dessert, I hope you have a reason to celebrate soon! Be sure to Post a Comment if you make Blackberry Chocolate Cheesecake and let us know how you like it. As always, thanks for reading.

Blogging tips