Welcome ROCmommas, ROCpoppas, and Friends!

Have fun with your kids - that's what it's all about. If you're looking for fun places to go in Rochester, NY (ROC), awesome
crafts to make, and yummy treats to bake with your kids - as well as some ideas for Date Nights - then you've come to the
right place. Welcome to ROCmomma. Happy reading, and please share your comments. Thank you!

Monday, January 14, 2013

Tips and Activities for a Road Trip with Kids - Part 1

Going away with the kids? We know how even a short car ride can elevate the blood pressure and make you want to banish the word "Mom," so what could a five hour car ride do to your physical and mental well being? Never fear! After five years of traveling five hours or more with the kids, this ROCmomma has learned a thing. Or maybe even two.

When the boys were younger, we were able to feed them an early dinner, get them into pajamas and head out around 5:00 equipped with snacks, the DVD player and some movies, and a few toys. They would eat a snack, watch a movie, play with a couple of cars, and be asleep within two hours.

But sometimes you need to head out in the morning. So, with three-day weekends and winter break coming soon, how can you make the trip more bearable for the kids and the grown-ups? I'm so glad you asked.

1. Emergency Kit
Act like a Girl Scout or Boy Scout and be prepared. You just never know what will happen. There was one trip where we were in stand-still traffic on the thruway when my then-four-year-old vomited all over himself and his car seat. It has not happened since, but we are still prepared.

In addition to a small first aid kit (Band Aids, antiseptic wipes, and first aid cream), we also carry a roll of paper towels, a package of wet wipes, and some empty plastic bags in the trunk. Depending on the weather and the age of your children, you may also wish to create a more well-equipped car kit.

2. Treats
Pack snacks in individual containers. You do not want to deal with opening packages or pouring goldfish crackers in the car. That is just a mess waiting to happen. We have a snack bag (a great repurposing for a used gift bag!) that gets filled with granola bars, fruit leather, boxes of raisins, and assorted other favorites portioned out into 8 ounce plastic containers (such as Ziploc). Don't forget to pack some snacks for the driver and navigator as well.

Staying hydrated is also important while traveling. We fill up the kids' sippy cups and our reusable water bottles, plus we fill one or two extra reusable water bottles to refill the kids' cups.

3. Good Music for the Whole Family
Set the mood with some fun, upbeat tunes. Of course you want your kids to be entertained during the road trip, but it doesn't have to be at your expense. If some of their music really grates on your nerves, you may want to "forget" those CDs at home, or temporarily delete them from your MP3 player.

Some of our top picks in kids' music: Welcome to Ralph's World by Ralph Covert, Juice Box Heroes by Imagination Movers, Snack Time by Barenaked Ladies, and No! by They Might Be Giants. Laurie Berkner and Dan Zanes also make adult-friendly music for kids.

4. Toys
Obviously, the items you pack will depend on the ages and interests of the children. We opt for things that do not have too many parts and do not require help from mom or dad. Right now the boys - ages 3 and 5 - enjoy playing with Matchbox pop-up adventure play sets in the car. We have the Mickey Mouse, Sponge Bob, and Diego sets (all were gifts for our boys).

We also usually grab some cars, dinosaurs, and other random fun toys; in this case, a slinky and Rubik's cube-type toy. I am a big fan of the dollar bins at Target, Michael's, and A.C. Moore. Also The Christmas Tree Shops and Dollar Tree usually have some fun options. You can pack things up in a tote bag, used gift bag, plastic zip-top bag, or even repurpose a used diaper-wipes container (below). One container per kid, and when they get bored they can switch.

5. Coloring Books, Crayons, and Stickers
Along with toys, we like to pack things for the kids to do. Crayons often get lost in the car, but we have found that stickers keep them occupied. TIP: I like to remove the background from sticker sheets ahead of time so it is easier for the kids to peel off the stickers by themselves.

When you visit the dollar bins at the stores mentioned above, keep an eye out for Play Packs (mini coloring book, stickers, and four crayons...all for $1), invisible ink pads, etc. These are great options for the car. Crayola Color Wonder markers and paper are also convenient for the car.

You can also put together a binder full of activities for older kids (ages 2 1/2 +)...which will be featured in Part 2.

6. Mile-Marker Rewards
If you don't want to offer the kids all options at once, consider wrapping up the toys and trinkets and  reward the kids every 100 miles for their good behavior. Start the trip with one reward and explain that if they are on their best behavior, they will get another reward when the car reaches 100 miles. Map the trip ahead of time and plan accordingly so you don't run out early.


7. Electronics
I loathe the fact that we allow our kids to veg out in the car and watch an endless loop of Scooby Doo. However, sometimes it's a necessary evil. It passes the time, and pacifies the kids so you can have a bit of peace during the trip. Of course, the usual suspects are a portable DVD player and DVDs and hand-held games. Santa Claus brought a LeapPad for the boys to share, so that is a new favorite in the car. We have to keep an eye on the clock so that both boys get equal time to play.


8. Sing Some Songs
Yes, it's reminiscent of the Griswalds, but your kids will have fun. Bust out the classics like Old McDonald, BINGO, Mary Had a Little Lamb, Row Row Row Your Boat, and anything else you - or your kids - care to belt out. Laughter is guaranteed.

9. Play Classic Car Games

  • I'm Going On a Picnic - One person starts with, "I'm going on a picnic and I'm bringing apples." The next person says, "I'm going on a picnic and I'm bringing apples and bananas." The next person says, "I'm going on a picnic and I'm bringing apples, bananas, and chocolate." And so on. For older kids, try to go in alphabetical order with the picnic items.
  • Color Safari - Look out your windows and search for all the colors of the rainbow. The first person calls out a color. The person to find something of that color first gets to call out the next color. 
  • Letter Hunt (Shape Hunt for younger kids) - Find each of the letters of the alphabet on signs, license plates, etc. 
  • Simon Says - "Simon Says touch your nose," and any other motion that can be done sitting down.

10. Activity Binder
Check out the next post in our Tips and Activities for a Road Trip with Kids series to learn how to make your own!


I hope these ideas help put your mind at ease and make you better prepared for your next road trip with the kids. Be sure to check out the next post for the final page of the Activity Binder, and one super-fun activity.

Do you have more words of wisdom to share about road trips with the kids? Be sure to Post a Comment and let us know. Thanks! As always, thank you for reading.


Link to:
Tips and Activities for a Road Trip with Kids - Part 2
Tips and Activities for a Road Trip with Kids - Part 3

Friday, January 11, 2013

Family Fun This Weekend

The days are starting to get longer (yay!), but it's still pretty sloshy outside (boo!). The happenings this weekend are few and far between, but they sound like fun. At least we always have Strong National Museum of Play, Rochester Museum & Science Center, and the Seneca Park Zoo to keep us busy. Check out the other events going on...


FRIDAY

Game Night
Friday, January 11 from 5:30 - 8:30 p.m. (repeats on Fridays through June 14, 2013)
ArtsROC, 3462 Monroe Avenue, Pittsford, NY
Kids ages 5-12 can enjoy movies, Wii, Xbox, Minecraft, tons of LEGOs, and a pizza party for $25 at ArtsROC. Call (585) 218-9125 or email info@artsroc.net for more information. Or click here to register.

Family Fun Night to Benefit West Webster Fire Department
Friday, January 11 from 6 - 8:30 p.m.
YMCA - Bay View, 1209 Bay Road, Webster, NY
Enjoy swimming, inflatables, crafts, snacks, games, and more. Cost is $20 per family.

Family Night: Ice Cream Social
Friday, January 11 from 4:30 - 10:00 p.m.
YMCA- Southeast, 111 East Jefferson Road, Pittsford, NY
The Adventure Center is open from 4:30-9 p.m. (remember your socks!), enjoy pizza in the Lobby at 5:45 p.m until it runs out ($1/slice) plus ice cream, make a craft, play in the Gym from 6-8 p.m., and swim in the pool from 7-10 p.m. Free and open to the community.

Fun Fridays
Friday, January 11 from 6 - 8 p.m.
YMCA-Westside, 920 Elmgrove Road, Rochester, NY
Family gym games, inflatables, obstacle course, crafts, and family swimming. There is no fee for members; $10 per family for the community.

SATURDAY

Toddler Dance Party
Saturday, January 12 from 10:30 - 11 a.m.
Henrietta Public Library, 455 Calkins Road, Rochester, NY
Dance your sillies out! Kids ages 18 months - 4 years old can have a blast dancing with their caregivers. No registration required.

Open Gym & Extreme Sports Practice Night
Saturday, January 12 at 6:30 p.m. (repeats Saturdays through May 25)
Sports Academy of Victor, 6385 Route 96, Victor, NY
Have fun with mats, sports equipment, tumble track, foam pit, turf field, batting cages, spring floor, and inflatables. Instructors are available to help. For ages 6 and up; cost is $10.

SATURDAY-SUNDAY 

Ski, Snowshoe, or Walk the Village & Nature Center
Saturday, January 12 - Sunday, January 13 from 10 a.m. - 5 p.m. (Saturdays & Sundays through Februrary 24, 2013)
Genesee Country Village & Museum, 1410 Flint Hill Road, Mumford, NY
Ski, snowshoe, or hike through the snow-covered village and nature center trails. The Nature Center trails are open 10 a.m. - 5 p.m., while the Historic Village trails are open noon - 4 p.m. only. Call (585) 294-8262 to check trail conditions. Free for members, $5.50 for non-members. Ski rental is $10, snowshoe rental is $5; equipment available on first come, first served basis. Equipment rental is available at the Nature Center.


SUNDAY

Family Fun Game Day
Sunday, January 13 from 1:30 - 4:30 p.m.
Rochester Public Library (Central Library), 115 South Avenue, Rochester, NY
Families are invited to come to the Children's Center of the Central Library to enjoy a variety of games for ages 3-11. This program is free, so bring the whole family.


Have a great weekend, and as always, thanks for reading.

Winter Crafts for Kids

Craft Time! There are still a few inches of slush outside, and I don't feel like taking the boys out to play in muddy snow. So, originally I had set out to make snowflake crafts with my boys today. They went in a different direction, but that's okay.

I covered the table with an old plastic tablecloth, and then set up three stations: Snow Painting, Watercolor Snowflakes, and Popsicle Snowflakes.

SNOW PAINTING
Materials needed:

  • dark construction paper
  • used packing peanuts
  • a small bowl or tub from the recycling bin, cleaned and dried (margarine tubs work well)
  • shaving cream (not gel)
  • white craft glue
  • plastic spoon
  • paint brush or foam brush

Directions:
Be sure your work space is covered.

First have your kids mix shaving cream with glue - about half and half - in the empty tub. Stir with the spoon until it's combined, and then paint away. The paint stays puffy when it's dry!

We added packing peanuts to our Snow Paintings to add more texture and dimension.

WATERCOLOR SNOWFLAKES
Materials needed:

  • heavy-weight paper 
  • watercolor paints
  • paintbrush
  • small cup of water
  • masking tape or painter's tape

Directions:
First, cover your work space. Next adhere masking tape to your paper in any design. I was thinking we would do snowflake designs, but one wanted his name and the other wanted a crayon shape.

Let your kids go crazy covering the whole paper with watercolors.

After the painting is completely dry, help your kids carefully remove the tape. The tape "resists" the paint so any shape created by the tape is now white, contrasting with the colorful background.

POPSICLE SNOWFLAKES
Materials needed:

  • 4 wooden craft sticks (popsicle sticks) per snowflake
  • glue dots
  • assorted glitter paints, regular paints, sequins, etc.
  • ribbon for hanging

Directions:
First, be sure the work space is covered.

Next, use glue dots to adhere popsicle sticks together. First create a "+" shape with two sticks (glue dot in the center, where they cross), then add the other two one at a time to create diagonal lines through the cross. Voila! Snowflake. NOTE: You may have to help young kids with this part, or just complete it for them.

Now for the fun part. Let your kids go crazy with glitter paint pens, regular paint, and anything else you have on hand. Sequins, craft feathers, small pom poms, buttons, and pipe cleaners are all fair game.

Once the snowflakes are dry, secure a ribbon loop to the back using another glue dot. Hang the snowflakes and enjoy your winter wonderland.


I hope you and your kids enjoy making these winter crafts. Post a Comment and share your winter craft ideas, too! As always, thanks for reading.  

Tuesday, January 8, 2013

Tex Mex Pasta

What's for dinner tonight? Ugh. The dreaded question. Here is one recipe that used to be a regular go-to  in our house. My ROCpoppa brought it up last week and mentioned that we had not eaten it in a while.

It is a vegetarian recipe because, well, we are vegetarians. However, you could use ground beef or ground turkey if you are so inclined. If you are a cheese fan, go ahead and add some cheddar or pepper jack. Either would be delicious.

Do you have kids (or other picky eaters) who don't like to mix foods together? No problem there, either. You could have a scoop of pasta, a pile of black beans, a cairn of corn kernels, and maybe some mild salsa or cherry tomatoes on the side. Easy peasy. If the picky eaters prefer a different type of pasta, that works too. Wagon wheel shapes are equally appropriate for a Tex Mex Pasta, in my opinion.

Tex Mex Pasta is a yummy chili-like sauce smothering some curly rotini noodles. You could top it with cilantro, a squeeze of fresh lime, sour cream, diced avocado, shredded cheese, or any combination of these. It is also equally delicious all by itself.

This is a good recipe to use up leftover veggies in the crisper; you could use a red pepper, green pepper, or half of each. While sautéing the peppers, feel free to add sliced mushrooms, diced carrots or celery, chopped onion, diced potatoes or sweet potatoes, or anything else you have on hand. In all honesty, I have even resorted to frozen pepper-and-onion stir fry mix, or frozen potatoes O'Brien (with the diced onions and peppers mixed in). We do what it takes, right?

As far as the beans are concerned, I prefer black beans in this recipe, but last night I ended up throwing in half a can of chick peas that was leftover from another recipe. Pinto beans, kidney beans, or cannellini would all be outstanding substitutions, too.
Tex Mex Pasta
Serves 4-6 (depending on how hungry you are)

1 box whole grain rotini
1 bell pepper, diced
4 oz. diced green chilies (or 1 fresh jalapeno pepper, diced, veins and seeds removed)
2 c. meatless crumbles (such as Lightlife Smart Ground or Morningstar Farms Grillers Recipe Crumbles)
16 oz. black beans, rinsed and drained
1 c. fresh or frozen corn kernels
2 -16 oz. jars of your favorite salsa
fresh cilantro, chopped (optional)
lime wedges for serving (optional)

1. Bring a large pot of water to boil for the pasta. Cook according to package directions, and drain.

2. Meanwhile, in a second large pot spritzed with olive oil or cooking spray, saute diced bell peppers over medium heat about 5 minutes. Add diced green chilies and meatless crumbles; stir to combine and heat through, about 3 minutes.

3. Add black beans, corn, and salsa. Stir to combine and bring to a simmer. Lower heat and let simmer about 5 minutes.
TIP: If young chefs want to help in the kitchen, they can combine the beans, corn, and salsa in a bowl and stir them together for you. It's not really necessary, but sometimes you just have to find something they can do to help.

4. Combine drained pasta with the sauce. Toss well and serve with fresh cilantro and lime wedges for squeezing, if desired.


If you have a lot leftover, Tex Mex Pasta is wonderful reheated for lunch or "Leftover Night." It also freezes well; just scoop into freezer-safe containers or zip-top bags and slide them right into the freezer. Enjoy! And as always, thanks for reading.


Friday, January 4, 2013

How to Reuse, Repurpose, and Recycle Your Holiday Cards

If you're anything like me, you are still feeling the effects of the Holiday Hangover. The tree is still up because you don't feel like digging out all the ornament boxes yet. Christmas music is still in heavy rotation on your iPod because you couldn't be bothered to update your playlists. The Christmas cards are still hanging up because you haven't had the motivation to take them down yet.

Hold it right there!

Before motivation sets in and you take down those cards, check out these ideas to reuse, repurpose, and recycle them. It will be quick and painless; I promise.

STEP ONE: Separate.
Separate your cards into two piles:

  1. Cards to Keep - I like to keep some of the photo cards; one day I will make a scrapbook entitled "Other People's Kids" to document how the kids have changed from year to year. Someday. Right now they get banded together in an envelope marked with the year, and then tucked into a box labeled - you guessed it - "Other People's Kids."
  2. Cards to Reuse, Repurpose, and Recycle - this is all of the other cards.
Set aside the Cards to Keep, and we'll focus on the Cards to Reuse, Repurpose, and Recycle. 

STEP TWO: Separate, again. Then, REUSE.
Separate out all of the greeting cards (as opposed to the photo cards) from the Cards to Reuse, Repurpose, and Recycle pile. 

St. Jude's Ranch for Children repurposes used greeting cards into new greeting cards for all occasions. These cards are sold in packs of 10 for $10 to support their programs and services. Customers receive a fun, "green" set of cards and the children at St. Jude's Ranch receive payment for their work, learn about basic job skills, and learn about the importance of recycling. 

St. Jude's cannot accept Hallmark, Disney, or American Greetings cards, so those must be sorted out and set aside. The remaining cards can be sent to:

St. Jude's Ranch for Children
Recycled Card Program
100 St. Jude's Street
Boulder City, NV 89005

St. Jude's accepts greeting cards for all occasions. So save this address and do the same with birthday cards and thank you cards throughout the new year.

STEP THREE: REPURPOSE.
Make some gift tags out of those other cards. 

I don't know about you, but I'm always sure I have gift tags on hand. I buy wrapping paper, finish making my list and checking it twice, wait until the kids are asleep, dig out the scissors and tape, turn on Elf, and - what do you know? No gift tags.

If you are a crafter and have large punches or decorative-edged scissors, now is the time to bust those out. If not, no problem; regular scissors will work. Just get busy punching and cutting out shapes and background designs from those unwanted cards. 

You can get fancy and layer the cut-outs, or just leave them as is and use a permanent marker such as a Sharpie to write on them next year. A white address label could also be a good layering element since it would give you a great spot to write the "To/From" part. The possibilities are endless. But the point is to complete this step now. If you set aside the cards to do it next year, it just won't happen. Trust me.

STEP FOUR: RECYCLE.
Gather what is left of the cards and deposit them into your recycle bin. 

Now smile with the knowledge that you helped a charity, made progress for next Christmas, and helped the planet. Go You! 

I hope you find the motivation to undecorate, if you haven't already done so. And have fun reusing, repurposing, and recycling your holiday cards. If you have another tip for used cards, please Post a Comment and let us know. Thanks for sharing. As always, thanks for reading.


Thursday, January 3, 2013

A Great Gift Kids Can Make for a Grandparent

Do you have a loved one who lives in a nursing home or assisted living facility? We do, and we know it is truly difficult to come up with gift ideas for birthdays and holidays.

Food baskets, baskets of flavored teas and coffees, fruit baskets. These used to be popular favorites for my ROCpoppa's grandmother. But in a nursing home, food is provided and/or monitored. I thought a brightly colored, warm blanket might be a good idea. Something to cheer up her room. But it seems like extra "things" are not the best options anymore. There is a lack of storage space for things like extra blankets or even for additional clothing. A lack of wall space for framed photos or prints. A lack of surfaces for knick-knacks. A lack of floor space for plant-stands and the like. UGH! So what is left?

My ROCpoppa came up with an amazing gift idea for his grandmother: time we can spend together. Novel concept, huh? A non-material gift that truly came from the heart.

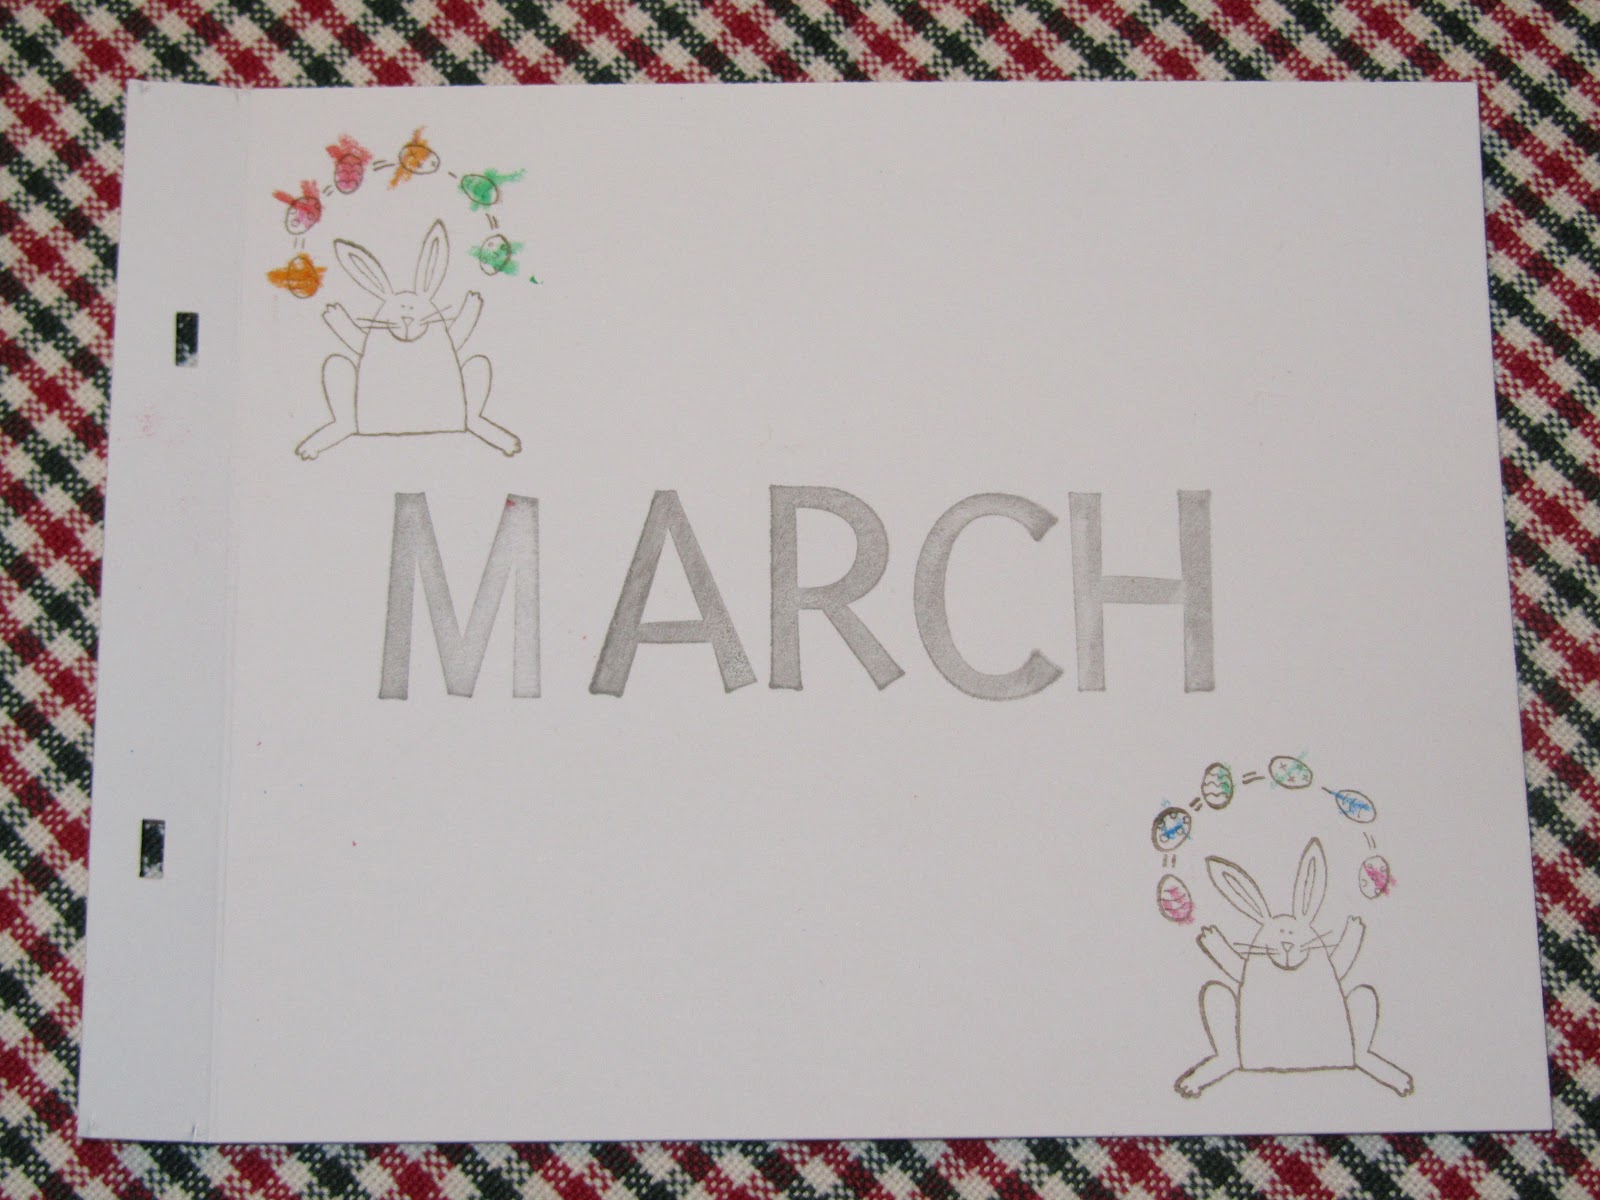
Did you ever make one of those coupon books for your parents when you were younger? Coupons for an extra hug, doing the dishes, cleaning your room, or taking out the trash? Well, we used that as a basis and came up with 12 activities - one for each month - that we can do together during visits to the nursing home. We wrote them out on pieces of card stock, the kids decorated them, and then I bound the pages together with ribbon. We boxed it up and wrapped it, and I'm pretty sure she loved it.
Yes, it's simple. No, it doesn't cost much. But if it truly is the thought that counts, then this is a perfect gift for any loved one...but especially those who have limited mobility, or who live alone and could use lots of visiting time.

We begin with January, when we'll make snowmen and snowflake crafts to decorate her room. We stamped a snowman and snowflakes on the card, and then my three-year-old decorated it further.

The flip sides look like this:
Here are the rest of the pages.
 FEBRUARY: Craft Time - Make Valentine's Day decorations together.
 MARCH: It's Easter - Color Easter eggs together.
 APRIL: Game Time - Do puzzles together.
 MAY: Outdoor Time - Go for a walk outside together.
 JUNE: Craft Time - Make sun catchers for the window.
 JULY: Game Time - Play board games together.
 AUGUST: Movie Time - Watch a movie together.
 SEPTEMBER: Game Time - Play card games together.
 OCTOBER: It's Halloween - Paint pumpkins together.
 NOVEMBER: Treat Time - Decorate cookies together.
DECEMBER: It's Christmas - Decorate gingerbread houses together.

Obviously you can taylor the activities based on the ages of your children, and the capabilities of your loved one. Our kids are three and five, so these are all activities they can do with their great-grandmother, and we know we will all enjoy them.

Some specifics about the booklet:

  • I started with three sheets of 8 1/2 x 11" white card stock and trimmed each to four 4 1/4 x 5 1/2" rectangles
  • To line up the holes for the ribbon without measuring and marking each page, I inserted the paper as far as possible into the hole punch. This way, each hole was in roughly the same spot.
  • Cut the ribbon longer than you need, and trim each end with a diagonal cut. This will give you a "point" to thread through the holes. Tie your bow, then trim the ribbon once again to get rid of any edges that frayed during the threading process.
I hope you and your kids have fun making a gift like this, and that your loved one truly appreciates the sentiment. Enjoy your activities together, too! 

What activities did you include in your gift book? Post a Comment and let us know. As always, thanks for reading.

Wednesday, January 2, 2013

48 Simple Ways to Beat Boredom This Winter

Happy New Year! Hopefully your 2013 is off to a fabulous start!

Today was the first day back to work and back to school after some much-needed time off. However, I think we got too accustomed to being lazy. We traveled to visit family for the beginning of winter break, and then spent the last couple of days in pajamas and building Lego sets. As 11 a.m. rolled around, I found myself scrambling to get the kids dressed and fed before my oldest had to get on the bus for Kindergarten.

Yikes.

It was way too easy to stay in pajamas, skip getting to the Y for  a workout, and keep the TV on today. To be fair, the kids got a bunch of new toys for Christmas and they were having fun playing with them. But we can't do this every morning. So I decided to be proactive and make a list of fun things and put together a Boredom-Busting, Shake-Things-Up, Pick-Some-Fun activity box.

Step 1: Make a list of all the indoor activities you would be able to do in your home. I included board games and craft kits that we have, as well as toys that we have available.
Step 2: Write them down on slips of paper and place the slips in a container (check your recycling bin for a large jar, a shoe box, etc.). The contents of our snowman kit are currently outfitting a frosty friend on our lawn, so I used the empty container for our activities.
Step 3: Turn off the TV and have kids take turns picking out activities to do together.

Yes, it's that easy. Here is the list I used; feel free to customize it to suit your needs, what you have available, and what your kids enjoy.

  • Dance party
  • Paper airplane races
  • Simon Says
  • Cards n' Motion - grab a deck of cards; assign an activity for each suit (hearts = marching, diamonds = crawling, spades = jumping jacks, clubs = shake/wiggle); each player takes turns picking a card and doing the motion. For example, if a player picks the 8 of spades, he or she does 8 jumping jacks. Number cards are face value, ace = 1, jack = 11, queen = 12, king = 13.
  • Car races - with toy cars.
  • Fashion Show - even boys like to dress up; this is a great use of old Halloween costumes.
  • Obstacle course - set up a few household items for kids to go over, under, and through.
  • Play catch - roll up a sock and have fun tossing it around.
  • Puppet show
  • The Rabbit Hole - put throw pillows on the floor; all players are bunnies hopping through the garden; if you touch a pillow, you fall down the rabbit hole.
  • Wild Things - take turns calling out animals; all players make that animal's sound and act like that animal.
  • Bullseye bowling - make a target on the floor out of masking tape; players take turns rolling a small ball and try to get closest to the bullseye.
  • Puzzles
  • Play Twister (or another game in your collection)
  • Indoor ice skating - attach sheets of wax paper to your feet using rubber bands, and have fun "ice skating" on the carpet. Just BE CAREFUL; this is a slippery activity.
  • Craft Kit (we have a ton of these in the closet; I pick them up at Michael's and then forget about them)
  • Make a collage - old magazines, safety scissors, glue sticks, and paper. Or check the recycling bin for a cereal box as a 3-dimensional base for a collage.
  • Balance beam - just some masking tape on the floor, and have kids pretend they are walking along a balance beam. Or walking the plank!
  • Feather races - mark a starting line and finish line on the floor with masking tape. Each player puts a craft-feather (or wad of tissue paper) on the start line. On "Go!," players blow on their feather and try to get it to cross the finish line first.
  • Write a letter to a Disney character - Send to Walt Disney World Communications, PO Box 10040, Lake Buena Vista, FL 32830-0040. Your kids will receive an autographed picture from the character!
  • Guard the Eggs - make a large rectangle on the floor with masking tape; place a few balls in the rectangle; choose one player to be the guardian and "protect" the eggs; all other players try to steal the eggs; if a player gets tagged by the guardian while his or her hand is within the rectangle, that player becomes the new guardian.
  • Build a fort - some chairs and blankets are all you really need.
  • Blow ice bubbles outside - if it's cold enough, the bubbles will freeze in the air. All right, so there's one outdoor activity. But this is something we can do quickly, even from the garage with the door open.
  • Make a card and send it to someone special
  • Write a story - ask your kids who is in the story and what they will do; help them write it down and ask them to illustrate the story as well.
  • Dominoes - if you don't have actual dominoes, try setting up books or DVD cases and then knock them down.
  • Tic Tac Toss - make a tic tac toe board on the floor with masking tape; use two different colored sets of bean bags (or small stuffed animals, or balled-up socks) to play.
  • Band Practice/ Marching Band - anything that rattles, whistles, or can be hit with a wooden spoon is fair game. Play some music together, then become a marching band and perform all around the house.
  • Craft time - cover the table, pick a few art supplies, and see what your kids create.
  • Scavenger hunt - pick 10 cars or Monster High dolls or blocks; one person hides them then the other players try to find them; the person who finds the most is the next to hide items.
  • Play-Doh
  • Board game
  • Giant Busy Box - another craft kit we have on hand.
  • Legos
  • Coloring books
  • Make a sock puppet
  • Make salt dough shapes - If you have salt, flour, and water, you can make these. There are lots of recipes out there such as this one; grab some cookie cutters, let them dry, then paint them. Before letting them dry, you can punch a hole with the end of a drinking straw and then string them up later.
  • Air hockey (or another game in your home)
  • Hop scotch - using masking tape on the floor.
  • Balloon volleyball
  • Xbox Kinect game - yes, it's a video game, but at least it requires movement.
  • Paint a picture (water colors, finger paints, whatever you have)
  • Play freeze dance
  • Make pictures for the grandparents
  • Make pictures for the aunts and uncles
  • Make seasonal decorations - For example, January = snowmen & snowflakes; February = hearts; March = shamrocks and eggs; April = rainbows, umbrellas; May = flowers; June = outdoor-themed items; July = American flags; August = beach items; September = back-to-school-themed items; October = pumpkins; November = leaves; December = Christmas trees & candy canes. Obviously you'll need to tweak this according to your religion and cultural background.
  • Blow bubbles in the house! - into the bath tub, of course. This doesn't have to be a bath time activity. Leave the tub empty, and just let the kids blow bubbles into the tub to avoid a slippery, sticky mess in other areas of your home.
  • "Almost" Yahtzee - grab some dice and a pencil and paper for each player. Write the possible sums of the dice on each piece of paper (2 dice = numbers 2-12, 3 dice = numbers 3-36, 4 dice = numbers 4-48). Each player takes a turn rolling all the dice, adding the sum, and crossing that number off their list. 
There is a mix of active games, creative activities, and quiet games listed. I left out "making cookies" simply because I don't want a batch of cookies in the house. We ate way too much over the holidays, and I don't need anything tempting my will power. Completely selfish, but necessary right now.

I plan on keeping the "used" activity slips in a bag. Once we've emptied the jar, I can just throw them all back in to repeat this cycle...at least until the temperature rises a bit so we can play outside comfortably again.

I hope this inspires you to do some creative activities with your kids. Or grandkids. Or the kids you babysit. Just have fun! What is your favorite indoor activity with the kids? Post a Comment and let us know. As always, thanks for reading.
Blogging tips