I won't bore you with the details, but this morning was one of THOSE mornings. After the frustration subsided, I decided to be proactive. I felt a mission brewing: give the kids new motivation to do what they're supposed to do, and to prevent Nagging Mom Syndrome. And so, our new Chore Charts were born. The old ones were just sticker charts, but we've been using them for a while and the kids were a little tired of them. Lo and behold, new and exciting Chore Charts! Ooh! Aah!
First, I made a list of the things each child should be doing every day: finish their meals, put dishes in the sink, get dressed, pick up their toys, put shoes in their cubby, put dirty clothes in their hamper, and (selfishly) accompany me to the YMCA so I can get a little exercise. Next, I made a list of the things that we want to encourage throughout the day: keep their pants dry, share toys, be a good listener, play outside, and try new foods.
Then I gathered my supplies:
- 12 x 12 card stock, plus additional (2 sheets total will be enough)
- construction paper, card stock, or foam sheets - one color per chore
- die-cut letters or letter stickers
- velcro strips, dots, or squares
- foam mounting squares
- permanent marker
- scissors
- ruler and/or paper trimmer
- scoring element on paper trimmer OR bone folder OR ballpoint pen
- packing tape
- double-sided adhesive (or glue gun, or other strong adhesive)
- stickers for decorating
First, cut enough 2"x2" squares so that you have one per chore, preferably in a different color per chore. Use permanent marker to write each chore and/or draw a picture on each square.
If using velcro strips, cut enough squares so that you have one per chore. If using velcro dots or squares, no pre-cutting necessary. Leave the two parts of the velcro "sandwiched" together, peel off one side of the backing paper and adhere to the back of a chore square. Repeat for all chore squares. Be sure to leave the other side of the backing paper in place for the time being.
Take one piece of card stock and cut a rectangle 6 3/4" x 2 3/4". Holding the paper widthwise, use the scoring element/bone folder/pen to score the paper at the 1", 3 1/4", 4 1/4", and 6 1/2" marks. Turn the paper lengthwise and score at the 1 3/4" mark.
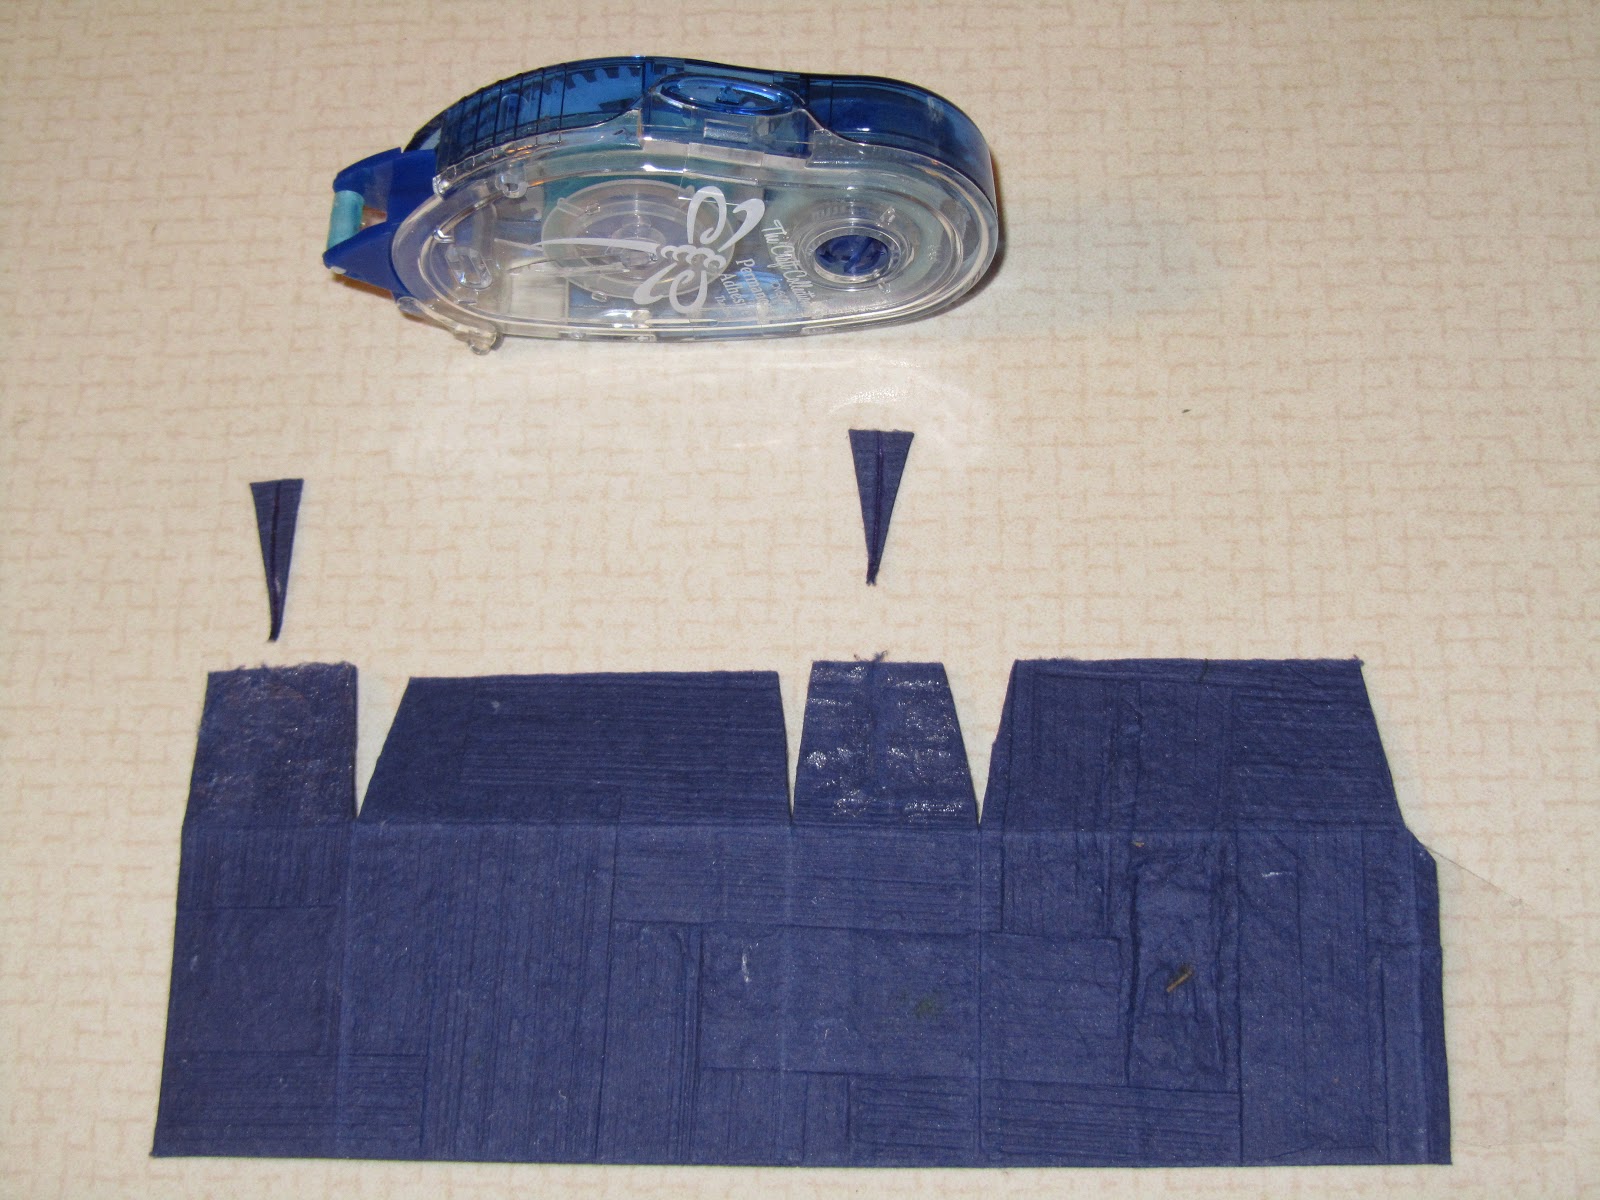
Next, cut small triangle slits on either side of the bottom lines, as shown below. On the end with the short flap (the right side, below) cut the triangle slit and also cut up at an angle (as shown). The flaps will form the bottom of your box.
Flip the paper over and place double-sided adhesive on the two shorter flaps.
Flip the paper back over and place adhesive on the longer flap that's close to the side flap (in this case, the longer flap on the right).
Fold up your box so that the two shorter flaps adhere to the longer flap between them. Next fold the longer flap with adhesive up to the rest. Press from inside and outside to make sure it's secure. Fold the side flap around and secure to the side of the box. Use a sticker or write "I did it!" directly on the box. Adhere foam squares to the back of the box, leaving their backing paper in place for now.
Cut a 4 1/4"x9" rectangle from card stock. Use permanent marker to write any notes about bonus stickers and how to earn them. Next, use clear packing tape to tape strips over the paper - basically "laminating" the paper with tape. This will allow you to remove stickers and reuse that portion of the page.
Layout your elements: child's name, chore squares, "I did it" box, and bonus sticker strip. Use double-sided adhesive to secure the letters and the sticker strip. Peel away the backing paper to adhere the chore squares and the "I did it" box.
Add stickers to decorate the chart, as desired.
Voila. Hang up your new charts and get ready to nag less!
Our old chore charts yielded ten cents per sticker earned. Once they accrued 50 stickers, we would go shopping for a $5 reward. The Dollar Tree, Target ($1 Spot, toward the front of the store), Michael's (bins located near the registers and throughout the store), and Christmas Tree Shoppes usually have options in this price range. We've even been able to find some LEGO sets for $4.99 at both Target and the LEGO store.
New rules: fill the "I did it!" box daily and we'll go shopping for a $5 toy at the end of the month. Bonus stickers will still equal 10 cents each, which can go in their piggy bank and be saved for something special and/or making donations.
I know that sounds a bit crazy but my five-year-old saved his coins for a few months so he could buy his own skateboard this summer. He did it! We brought about $25 in quarters to Target, and I'm sure the cashier was cursing me afterward but in the moment he helped my son learn a valuable lesson about earning, saving, and spending.
How do you handle chores in your house? Post a Comment and let us know your great ideas! As always, thanks for reading.


No comments:
Post a Comment