Welcome ROCmommas, ROCpoppas, and Friends!

Have fun with your kids - that's what it's all about. If you're looking for fun places to go in Rochester, NY (ROC), awesome
crafts to make, and yummy treats to bake with your kids - as well as some ideas for Date Nights - then you've come to the
right place. Welcome to ROCmomma. Happy reading, and please share your comments. Thank you!
Showing posts with label kids birthday parties. Show all posts

Wednesday, April 10, 2013

Kids Birthday Party: Race Cars

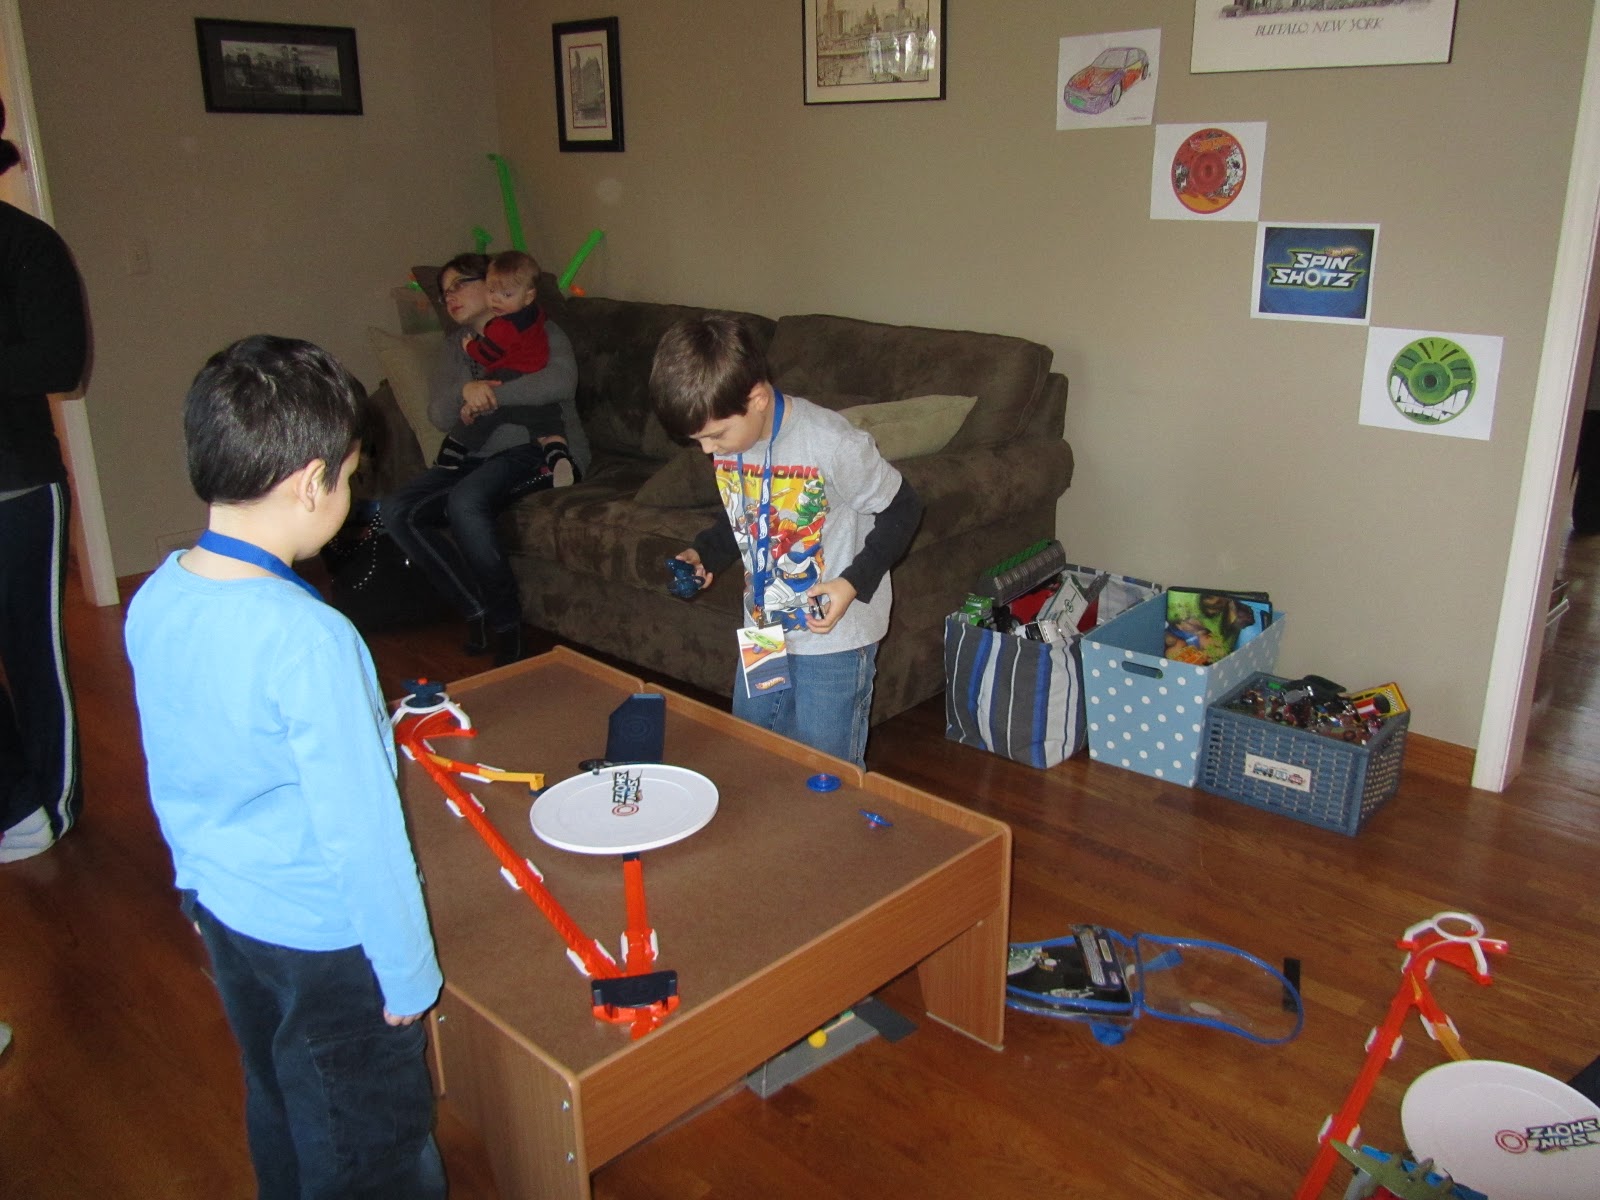
Last month we had the opportunity to host a Hot Wheels Spin Shotz House Party. That means we received a free party kit filled with Spin Shotz discs and race tracks, as well as some other party swag. Then we invited a bunch of friends to come over and play, and tell us what they thought of the toys.

The party planner in me approached this like a birthday party, so allow me to share the details for anyone looking to plan a race-themed birthday party in the near future. This could be easily adapted to any type of race-themed party, such as a race car party.

INVITATIONS

You could purchase race- or car-themed invitations, or you and your child can make your own with the help of some themed stickers such as checkered flags and race cars, along with some paper in the birthday child's favorite color.

DECORATIONS

I found a multi-colored pennant banner on clearance at Target and thought it was great for our theme. We hung it in our front hallway. Black and whited checkered pennants would have been perfect, but how could I pass up something similar on clearance?

We taped a black plastic tablecloth to the floor, using tons of tape on the perimeter's underside to keep it secure. We used additional strips of masking tape on top to create the dashed line of our roadway.
PARTY SWAG

Upon arrival, our guests were greeted with a personalized VIP badge on a Hot Wheels lanyard, thanks to our Spin Shotz party kit. And what is a race party without VIP badges? You can make your own ahead of time by purchasing lanyards with clips (found at office supply stores) and printing your own badges on card stock. Check out this template and download a free printable Spin Shotz badge.
PARTY GAMES

The most valuable thing I learned during student teaching was to change the stimulus every 15 minutes.  This is true in the classroom, at home on rainy days, and even at parties.

0:00 - 0:30          Free Play

  • Allow enough time for all guests to arrive before the structured activities begin.
  • Be sure there are enough race cars - or in this case, Spin Shotz discs - for each child to play.
  • Inspire some creative play by using low-tack painter's tape on the floor to create roads, parking lots, etc.
  • Set up a quiet activity for those who are shy and need to warm up to more active play; some coloring pages and crayons are a great option.

0:30 - 0:45          Let the Races Begin

You could get elaborate and create a tournament bracket for a super-fun racing showdown. Or set up a few race tracks and encourage the kids to race each other.
0:45 - 1:00          Go Off the Track

Provide the kids with props to create their own obstacles and stunts for the race cars or Spin Shotz discs. Props could include cardboard boxes in a variety of sizes, plastic cups, dominoes, building blocks, LEGOs, even a stack of books.


1:00 - 1:15          Pit Stop

Every race car needs to refuel, so set up a Pit Stop for your little racers. Our party was on a weekday morning from 9 - 11 a.m., plus there were some severe food allergies to consider, so our snack options were grapes, animal crackers, and fruit leather. Depending on the ages of the children, this might be a good opportunity to encourage a trip to the potty.
1:15 - 1:30          Arts & Crafts

Since we were having a Spin Shotz party, a spin art craft seemed appropriate. I had seen this idea a few times on Pinterest, so we gave it a whirl. You'll need:
  • salad spinner
  • washable tempera paints
  • white paper, trimmed ahead of time to circles that will fit in your salad spinner
  • masking tape
  • diaper wipes or wash cloths for quick clean-ups
Fold a piece of tape into a roll and use it to secure a paper circle to the bottom of the salad spinner. One at a time, help the kids drip a few blobs of tempera paint onto their paper (near the center works best) and place the top on the spinner. Let the kids operate the spinner...


...and voila!
1:30 - 1:45          Pin the Wheel on the Race Car

Who doesn't love a good round of pin-the-blank-on-the-blank? If this game goes too quickly, give the kids another chance to race on the tracks or on their obstacle courses.

1:45 - 2:00          Hot Car

Play "Hot Potato" with a race car or a Spin Shotz disc. Have the kids sit in a circle and hand one child a race car. Play some music and have them pass the car to their left until the music stops. When the music stops, the child holding the car is out. Once a child is out, give him or her a goody bag. Keep going until there is one child left (or until everyone has lost interest), and be sure everyone has a goody bag. Be sure to thank your guests for coming.


The boys had a great time playing at our Spin Shotz House Party. I hope these ideas are helpful, and that your party is just as amazing. As always, thanks for reading.


Disclaimer: While I received the Spin Shotz products for free, I did not receive compensation for this post. All opinions are actually mine.

Tuesday, April 9, 2013

How to Decorate an R2D2 Cake

When I asked my five-year-old what kind of birthday cake we should make for daddy, I should have known the response would be Star Wars-related.

It seems like Star Wars has captivated another generation; it is the current hot topic among Kindergarten boys. They know the plot lines of every episode of Clone Wars. They know which level their friends have beaten in Angry Birds Star Wars. They are constantly asked to stop humming Darth Vader's theme or pretending to shoot battle droids at school. They all want the LEGO Death Star (suggested retail: $399.99!) for their birthdays.

Really, it's no wonder my son declared that daddy needed an R2D2 cake.

Wilton used to make a wonderful R2D2 cake pan. Unfortunately it has been discontinued, and a search on Amazon yielded a used pan for $73.99. I wouldn't pay anywhere near $74 for a new R2D2 pan; is there really someone who would pay that much for a used one? Crazy.

Instead, here are the steps to make your own R2D2 cake, sans fancy pan.

Step 1: The Cake

First, prepare a cake from a packaged mix or from your favorite recipe, and divide the batter between a  round pan and a square pan. I used a 7" round pan and an 8"x8" square pan.

Once baked and cooled, cut the round cake in half and place on a large platter or baking sheet. Line up the square layer and trim a strip from the side and one from the bottom to make the two arms. Cut the remaining half of the round layer into thirds to make the feet.
Slide some strips of waxed paper under the edges before frosting your cake. This step will protect your serving platter from stray drips of frosting. When the paper is removed, all evidence of the mess will be gone as well. Yay.

Step 2: The Frosting

Next, you'll need a batch of your favorite white frosting (about 3 cups or more), or two tubs of white store-bought frosting. I used homemade cream cheese frosting, but buttercream also works well. Reserve half of the frosting as plain white.

Place remaining half of frosting into a bowl and add a few drops of blue food coloring; stir until evenly colored (Lightest Blue). Scoop three-quarters of the Lightest Blue into another bowl; add more blue food coloring and stir until evenly colored (Blue #2). Scoop two-thirds of Blue #2 into another bowl; add more blue food coloring and stir until evenly colored (Blue #3). Scoop one-half of Blue #3 into another bowl; add more blue food coloring and a squeeze of black decorator icing and stir until evenly colored (Darkest Blue).
From left to right: Darkest Blue, Blue #3, Blue #2, and Lightest Blue.
Step 3: Pretend You Know What You're Doing

While the Wilton pan is no longer available, you can still download the decorating instructions from their web site. Those instructions might be slightly more irritating than listening to Jar Jar Binks.

Luckily, this blog post from Way More Homemade provided detailed instructions that are actually useful.

Scoop some of Blue #2 or Blue #3 into a pastry bag or another decorator tool. Using the finished photo (near bottom) as a guide, or another photo of your choosing, draw the basic shapes on R2D2's body.
Doesn't that look amazing? Yeah, I was about ready to go buy a cake at this point. Any cake. But, do. Or do not. There is no try.

Use white or Lightest Blue frosting to cover all sides of the cake, except for the surface where your lines are drawn.

Use Lightest Blue and a pastry bag or other cake-decorating device to fill in the squares near the bottom of R2's body and the outer parts of his "joints," as shown below. Does yours look as pretty as mine? Are you nervous? Just stay with me. It will be great.
Use Blue #3 and Darkest Blue to fill in the shapes on R2's head and the remaining shapes on his body, as well as the "shadow" at his inner shoulders (gives it a little dimension), as shown below.

Use Blue #2 to fill in the rest of R2's head. Then use a tube of black decorator icing to outline all of the shapes, as shown below. See? Looking better already. Sort of.
Fill a pastry bag or decorator tool with white frosting and fill in all remaining areas. Use two red candies as the lights on R2's head. Ha! Now you can actually tell that it's R2D2! Told you it would be great.
 See how easy? You can do this too for your favorite Fanboy or Fangirl.
Happy decorating! As always, thanks for reading.


Wednesday, September 19, 2012

Putt Putt, Go-Karts, and Arcade Fun at The Clubhouse

The first time my five-year-old played mini golf was three years ago. He immediately loved the game and kept his focus and enthusiasm through all 18 holes. He carried his own club the entire time with confidence and pride. Sure, he would hit the ball once, then pick it up and carry it to the hole each time - but, hey, he was two.
Now, both of my boys (five- and two-years-old) are big fans of mini golf. We frequent Wickham Farms for their Two for Tuesday special. We enjoy All You Can Play Thursdays at Adventure Landing. During our little vacation in Niagara Falls this summer, the highlight was dinosaur mini golf. Our kids just love playing. So it's no doubt they literally jump up and down when we tell them we're going to The Clubhouse.

The Clubhouse Fun Center is located at 70 Jay Scutti Boulevard in Rochester, NY. There are two 18-hole mini golf courses, a Go-Kart track, and an indoor arcade. It is open year-round, but the golf and Go-Karts are closed during inclement weather. 

Surprise, surprise: we always start with a round of golf. If you've never been to The Clubhouse, you'll walk through the arcade and out the back doors; there is an outdoor counter on the right where you can pay for your game. Then, choose your course. The one to the left (as you're walking out the door) is a bit more decorated - with a castle, giraffe, waterfall, and more - but is a bit more challenging for the wee ones. The course that begins right across from the outdoor counter is easier for younger kids, but it still has obstacles on each hole to keep things interesting.
After 18 holes, what could be better than a race around a track in a Go-Kart?! There are single Go-Karts for kids and adults over 58" tall, rookie Go-Karts for riders who are 48"-57" tall, and double Go-Karts that allow younger kids (at least two years old) to ride while a licensed driver controls the car. I'll admit, the first time I drove a Go-Kart was this past summer with my two-year-old by my side. I was ridiculously nervous until I watched ten-year-old kids driving around the track and I realized: if they could do it, so could I. Know what? It's actually fun.
Our last stop is inside to play some arcade games. The kids love when tickets come out of the machines; it might be more exciting for them than actually playing the games. They also love the Ticket Eater - standing at the machine and sliding a ticket into the opening as it gobbles up the string of them, waiting for me to hand over the next one, then finally pushing the big button at the end to get a white square of paper showcasing their accomplishments of the day. Fifty-nine tickets. Enough to trade in for a rubber bouncy ball and a Tootsie Roll. Awesome. Thankfully, they're still young enough that just about any prize will bring giant grins. For those who do not require immediate gratification, you can save your receipts and turn in a bunch for a larger prize (the receipts do not expire).

The Clubhouse is stroller-friendly, and there is a diaper changing table in the women's restroom. The Treehouse Cafe offers pizza, snacks, and beverages. Be sure to visit their web site to check pricing and to print coupons before you visit for tokens, Go-Kart rides, and mini golf games. Or, Like them on Facebook for access to more coupons. They also offer monthly (September = 10 free tokens) and weekly specials:

  • Monday - play a game of mini golf at regular price and second game is free (10 a.m. - 5 p.m.)
  • Tuesday - 60 tokens for $10
  • Wednesday - large pizza, pitcher of soda, and 75 tokens for $25
  • Thursday - 3 Go-Kart rides, 3 Mini Golf games, and 30 tokens for $30
  • Friday - spin the prize wheel (10 a.m. - 5 p.m.)
  • Saturday & Sunday - unlimited Go-Kart rides and mini golf games, and 10 tokens for $12 per person (10 a.m. - 12 p.m.; April 15 - October 15 only)
The next time you're looking to treat your kids to something fun and active, check out The Clubhouse. Be sure to Post A Comment and tell us about your experience. As always, thank you for reading.

Thursday, June 14, 2012

Birthday Party Idea: Bike Party

It seems as though my soon-to-be-five-year-old son has quite the social calendar lately. He's been going to a few birthday parties and I'm always impressed with the things that parents create. Personally, I like to go crazy with our kids' parties. Before Party City, my mom used to make awesome cakes and decorations for our birthdays, and she came up with the coolest games. I'm trying to pass that tradition on to my kids. Plus, I was an event planner for about ten years, so I pay attention to the details.

Last weekend, my son went to a B.Y.O.B. party: Bring Your Own Bike (and helmet). His friend lives on a cul-de-sac which provided the most perfect location for a celebratory bike rally. My fellow ROCmomma Kathy created such a fun party, I just had to share it with you, dear readers.

When we arrived at their house, the cul-de-sac was decorated with large chalk arrows on the ground, to ensure all bikers rode in the same direction. There were road signs made from Pipeworks: a stop sign and a one way sign. They even made arch out of Pipeworks and tied different colored streamers on it, so the kids had a fun obstacle to ride through. Even the driveway was lined with a chalk-drawn "parking lot" for the bikes. The tables had black-and-white checked tablecloths, and there was a matching banner with black-and-white checked pennants, just like racing flags.

After riding around for a while, the kids took a break to make license plates and decorations for their bikes. ROCmomma Kathy had punched two holes at the top of a foam sheet for each child, and pre-packaged adhesive foam letters to spell each child's name. She had other stickers on the table - bowls of sports stickers and flower/butterfly stickers. When they were finished, the grown ups helped attach the license plates with zip-ties.

The bike decorating station also included beads, wraps for the spokes, streamers (clusters of ribbon, tied together with another piece of ribbon that is used to tie the streamers to the bike - you can make these), ribbons, and rolls of crepe paper streamers. Once the bikes were decked out, it was time to ride again.

Here's a shot of the license plate and streamers on my son's bike:
 Here are the wraps for the spokes:
 And some bike beads:
After lunch, the kids played Pin the Seat on the Bike. ROCmomma Kathy had made a poster of a bicycle, with the seat missing. It was a big hit.

A bonus tip if you're considering a bike-themed party: keep a first aid kit handy. There are bound to be a few scraped knees. Or the same kid will scrape his knee repeatedly (that would be my son; unfortunately, he gets his coordination, balance, and dexterity from me).

The kids had a blast at the bike party. My son didn't want to leave when it was over; we had to promise to come back for a bike-riding play date soon.

If you're tired of licensed-character themed kids' parties, why not try a Bike Party? If you live on a cul-de-sac, or near an open area with room to ride (a park or playground, perhaps), this might be your go-to idea for your child's next birthday.

As always, thank you for reading. Please Post a Comment to share your great birthday party ideas.
Blogging tips